if you haven’t heard

If you haven’t already put your smoothie in a bowl and eaten it with a spoon then you are really missing out. I think similar to avocado toast some foods are just super trendy. Not that it really matters ( because I’ll continue to have a love affair with avocado toast whether it’s cool or not)  but it does make it so that it’s constantly in your face on social media and makes you really want to try it.

I’ve never been able to eat right when I wake up. Probably why I love brunch so much. So with these bowls, I prep my smoothie ingredients while I get the kids fed and ready for the day, and pop them in the freezer. The fruit, not the kids. Though some days I might actually end up putting them in the freezer just for some peace and quiet.

By the time the house is calmed down and everyone else has been tended to, I can mix up my smoothie and make a fresh cup of coffee and eat without interruption. Ha. Yeah freakin right. But a girl can dream. This is my favorite mix up so far.

smoothie-0481

In a jar that I put in the freezer for about an hour was:

a handful of grapes

a few sliced strawberries

1/2 banana sliced

1/4 of a mango, diced

I blended all that with some diluted orange juice, a heaping spoonful of plain Greek yogurt, 1/4 of a green apple diced up, and packed the rest full of fresh spinach. Then topped it with granola, unsweetened coconut flakes, banana, mango and strawberries.

I made it longer than I anticipated before I was found out and the rest was gobbled by a girl still in cow print footed pajamas.

smoothie-0499

You can easily search on Pinterest for smoothie bowl recipes but here’s an easy link to get you started.

And if you aren’t already following Minimalist Baker you should be. Whether it’s here or here.  She has some fantastic smoothie bowl recipes and just about anything she makes looks so delicious. I’ve tried a few of her recipes out now and have yet to be disappointed. Falafels anyone?!?!?

this round’s on me

One of my favorite things about summer is using fresh ingredients that are in season. I was spoiled growing up in the northwest with the fact that it wasn’t hard to buy just about any produce, any time of the year. Try buying peaches in Alaska come November. It simply won’t happen.

So I try to stock the kitchen with all that I can to get the most of it. Cherries has been our current kick. They are delicious and an easy snack for the kids. Plus, my lavender is rampant in the yard so this syrup recipe seemed liked the perfect plan. The actual recipe was for a lemonade using this syrup, but I mean how boring?

IMG_8911

My current obsession is sanpellegrino. Grapefruit is my favorite and orange and lemon are great for mixers. Feel free to use Sprite or 7 Up if that’s your kick. Over ice mix 1 part vodka, 1/2 part cherry lavender syrup and the top the glass with lemon sanpellegrino. I’m sure Sprite or 7 Up would be just as tasty, but the lemon soda is tart and the syrup is super sweet, so it’s the perfect combo.

IMG_9062

The syrup is best kept in a glass container in the refrigerator, ready to use for all your summer parties.

recipe

You can use this recipe and simply omit the alcohol for a kid friendly version, or increase your measurements and make a pitcher of this concoction. I promise it won’t last long! Cheers!

IMG_8910

brussels sprout salad

You either love them or hate them. And I LOVE them! But you can only eat steamed or sautéed sprouts before you need a change. So we’re going raw people.

This salad can be prepped ahead of time and holds up great overnight. It’s perfect for a quick lunch or as a side for your next barbecue.

DSC_0003

You only need brussels sprouts, tomatoes, chickpeas, feta and a nut blend of your choice. I used this salad topping which was a blueberry almond mix.

DSC_0014

As far as measurements go, adjust according to how many you are feeding. Altogether this made approx 2 1/2 cups of salad.

Cut off the stems of the sprouts and slice in halves. Finely slice the halves, making a slaw out of them. I like to take about half of my bag of sprouts and do this. It’s easy to then throw in other salads or use as a topping for sandwiches or wraps. If you have a food processor it makes this step easier. I don’t mind a little chop chop action.

DSC_0005

DSC_0009

Now onto the dressing. This is one of my favorite salad dressings and like to have it on hand whenever I can. It’s a combo of two different ones. You can choose to make them all together or separate and combine like I did.

DSC_0385

In a measuring cup is a mixture of mayo and greek yogurt, sugar, apple cider vinegar and poppy seeds.

Then in a separate bowl make your creamy balsamic which is a simple base of mayo, yogurt, balsamic and oil. Throw in some garlic, mustard and brown sugar and mix in water until it’s nice and creamy.

DSC_0387

 Pour in your poppy seed dressing and add salt and pepper to taste.

DSC_0389

This recipe will make more than enough for your salad. Pour enough dressing over your chopped sprouts to coat and let them soak it up while you prep your other toppings. You can always cut this recipe in half or store it in the fridge for a later use. I use it on everything so I definitely make a full batch.

bottle

Chop your tomatoes and add them along with the chickpeas and stir.

DSC_0010

Top your salad with feta and nuts. Choose to share your tasty treat. Or not. I won’t judge.

salad

Poppy seed Dressing:

3/4 c mayo- I did 1/2 yogurt, 1/2 mayo

1/3 c sugar

2 tbsp apple cider vinegar

2 tsp poppy seeds

Balsamic Vinaigrette:

3 tbsp mayo or same 1/2 and 1/2 combo here

3 tbsp olive oil

3 tbsp balsamic vinegar

1 tsp mustard

1 tbsp garlic

1 tbsp brown sugar

2 tbsp water

salt and pepper to taste

Want another fabulous brussels sprout recipe? Make this pizza. It’s better than you would ever imagine.

deluxe taco pizza 

In the world of good eats, I pride myself on being good at a few things. I’d like to think I can make a mean batch of cookies, a delicious cocktail and one tasty pizza. This creation did not disappoint.

Crust. If your pizza has a bad crust or a bad sauce, its over. I have a few tried and true dough recipes and this one hands down is my favorite. It freezes well if you want to save it, and keeps good in the fridge for a later use also.

IMG_7840

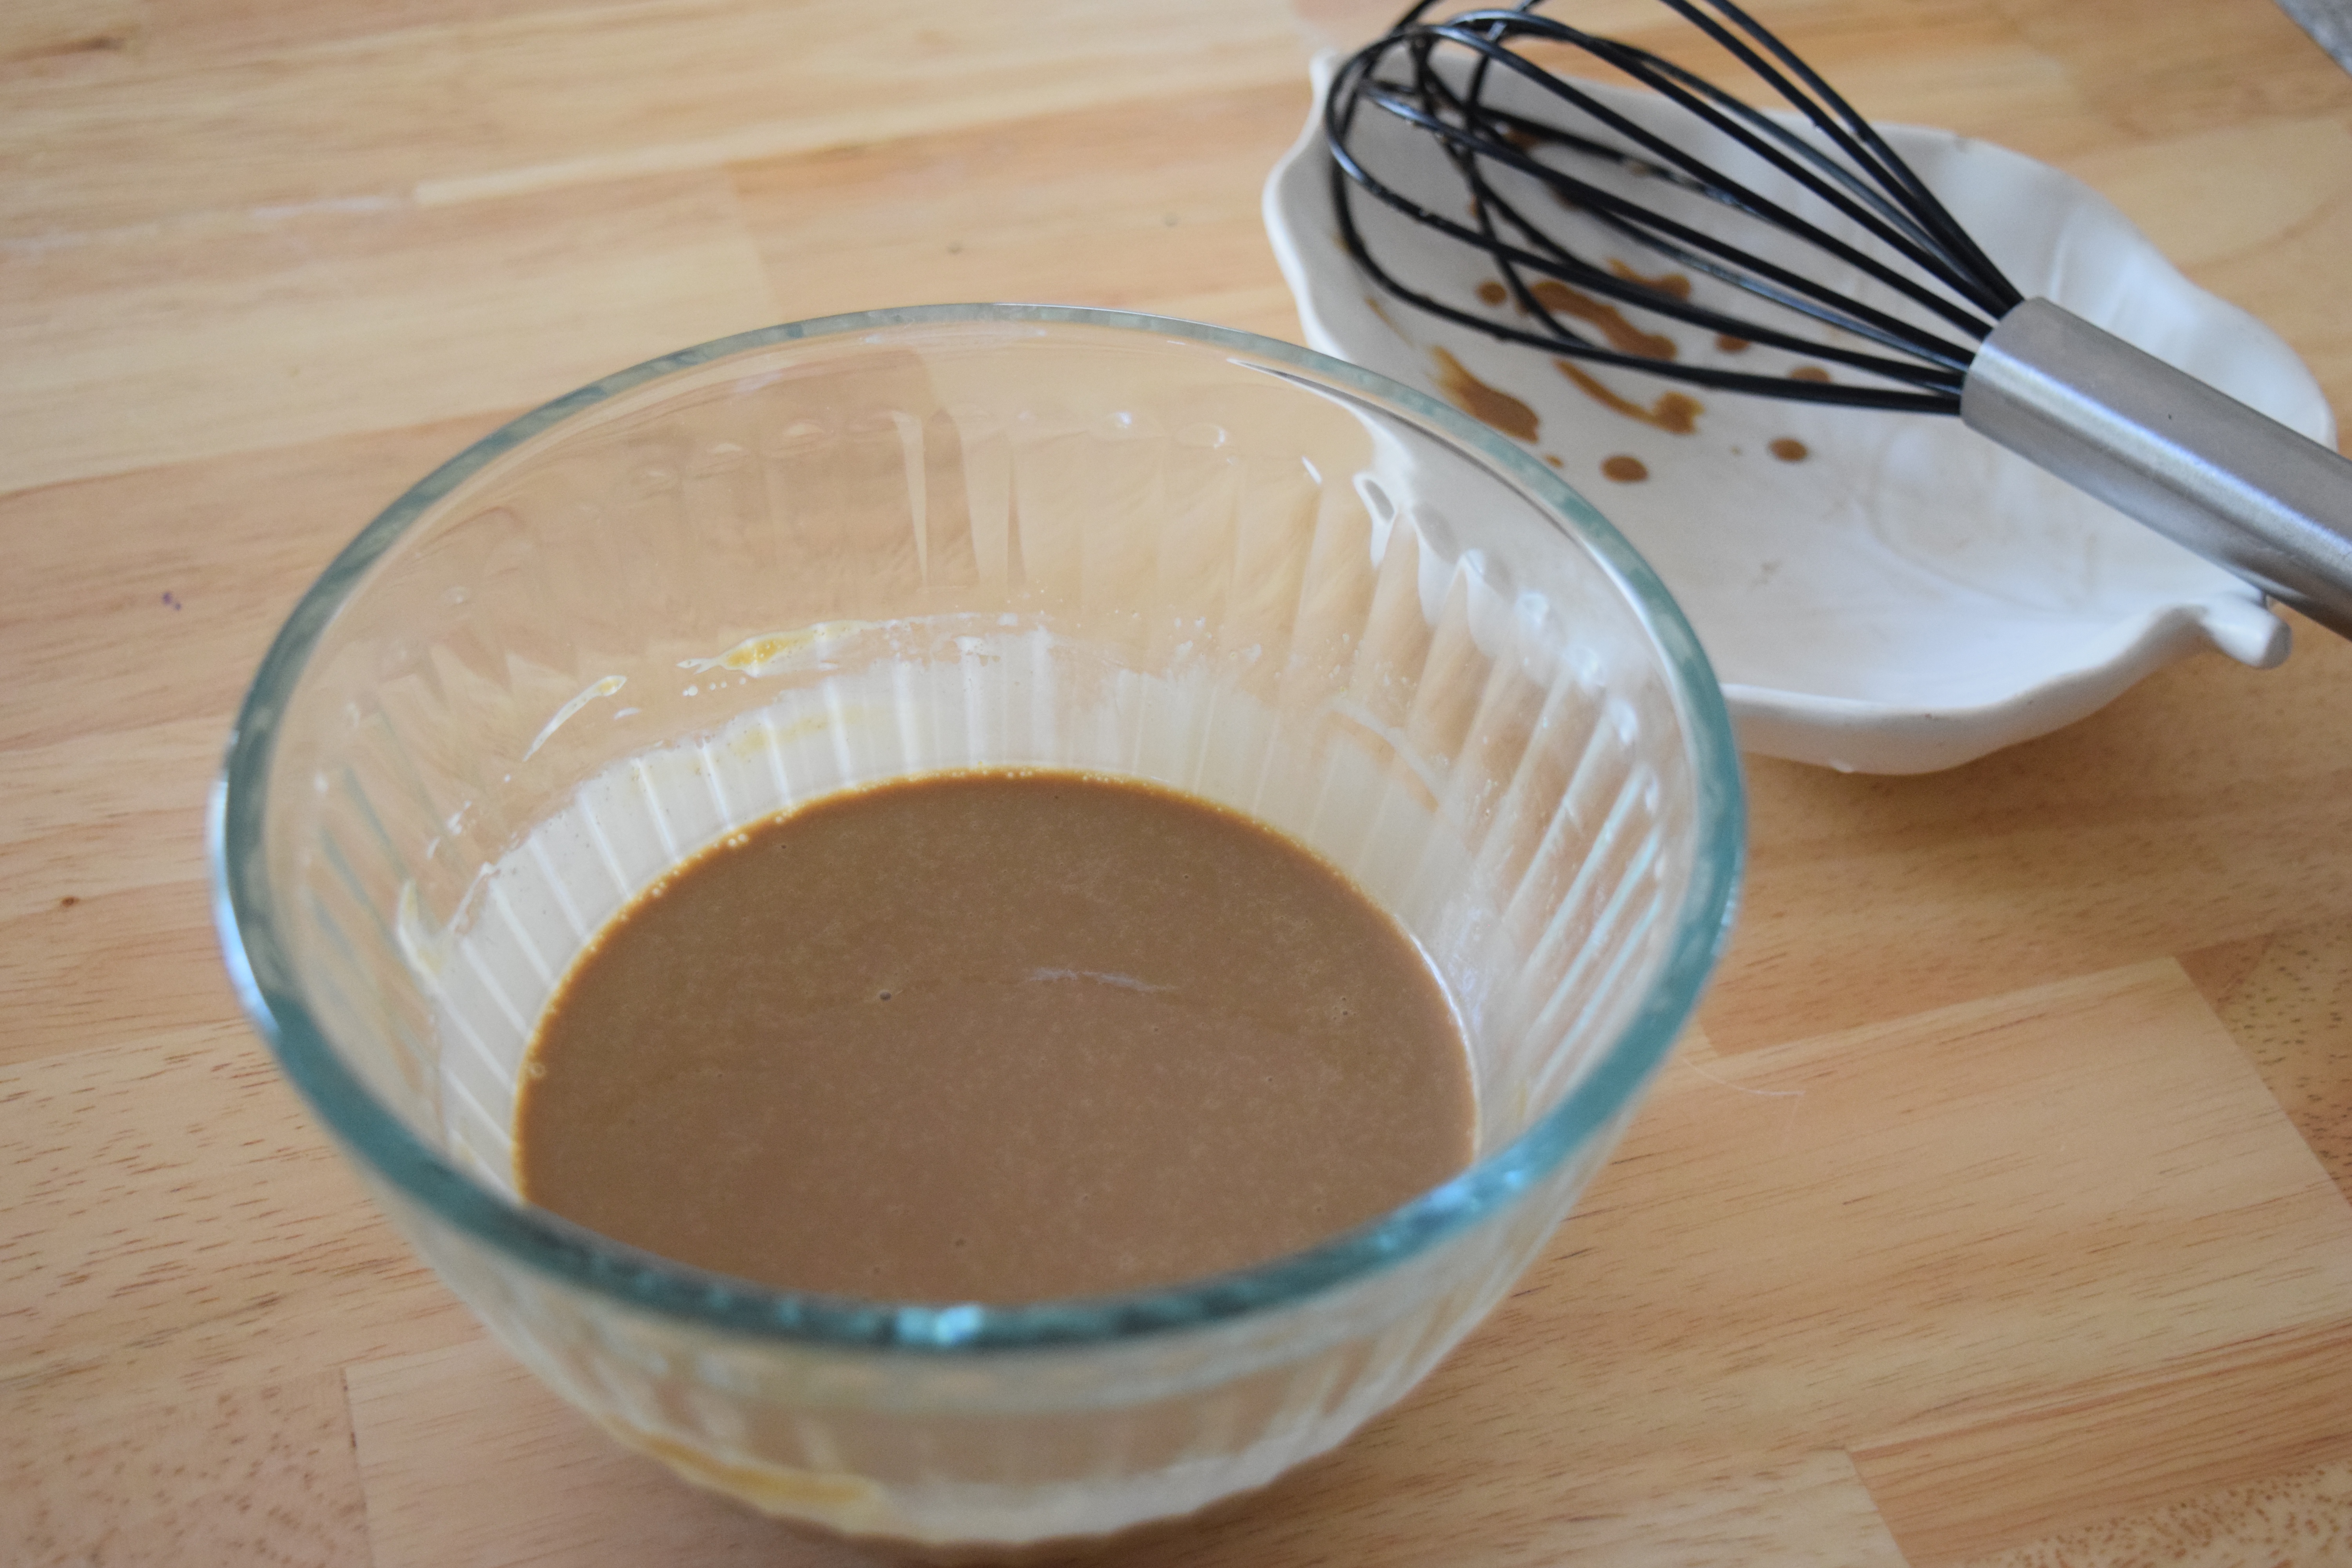
Start with 1 1/8 cup of warm water. Warm, not hot. Yeast can be tricky. Cold water won’t activate it and hot water will kill it. A package of yeast or if measured out, 2 1/4 tsp. Add a pinch of sugar, this will help get things moving. The sugar will feed your yeast and ensure your yeast is still active, it will be frothy and bubbly once you stir it.

Let that hang out while you gather your dry ingredients.

3 cups all purpose flour

2 tbsp olive oil 

1 1/2 tsp salt

IMG_7839

Add your water and mix. Get your hands in there and knead it until it comes together. You might be tempted to add more flour because your hands are a sticky doughy mess. Don’t do it. Once that oil finally mixes in, it will soften and be easier to manage. Adding more flour is just going to dry out your end result.

IMG_7841

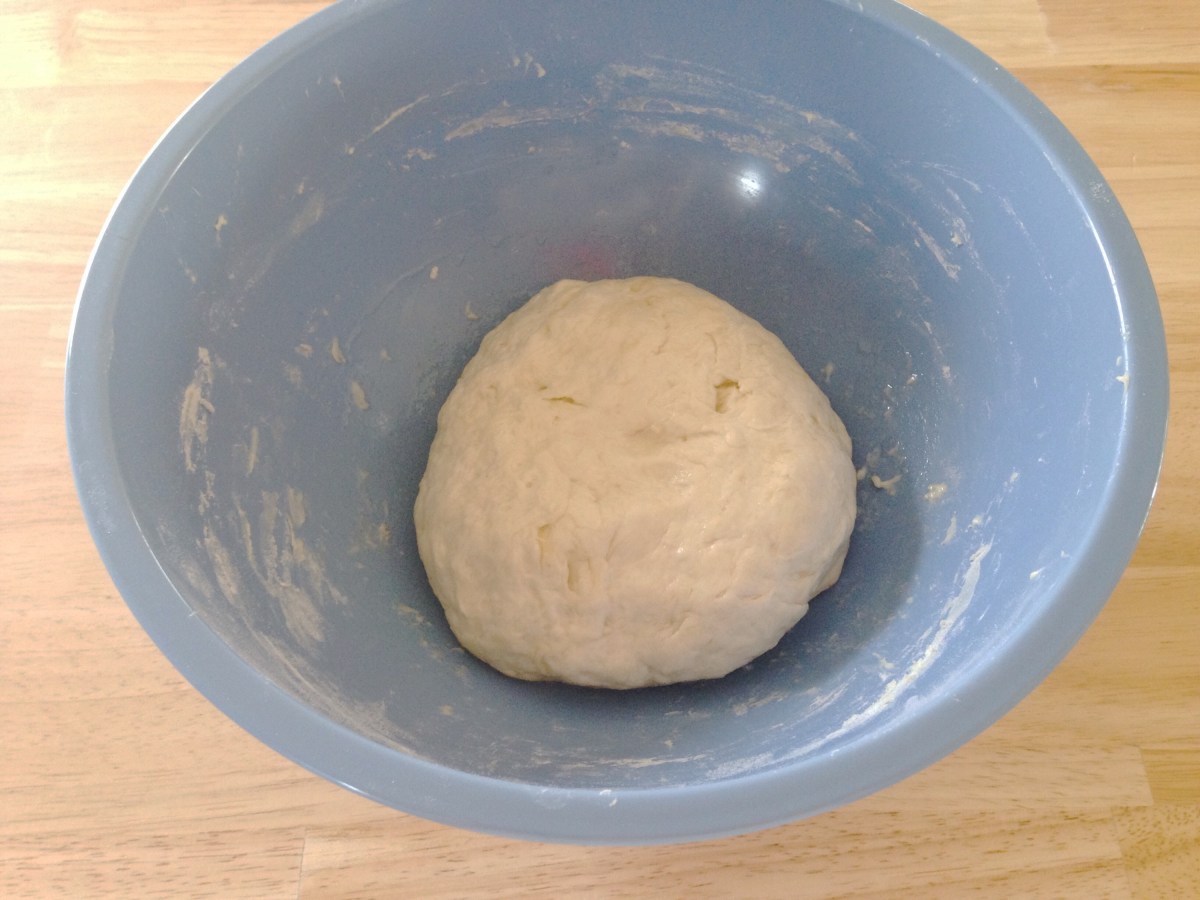
Place dough in well oiled bowl, cover and put in a warm spot in your kitchen. Let rise for at least one hour if not longer. Mine sat for a few hours before I messed with it. This gave me time to prep my toppings.

This is the part that makes this pizza deluxe. Some fancy toppings.

IMG_7838

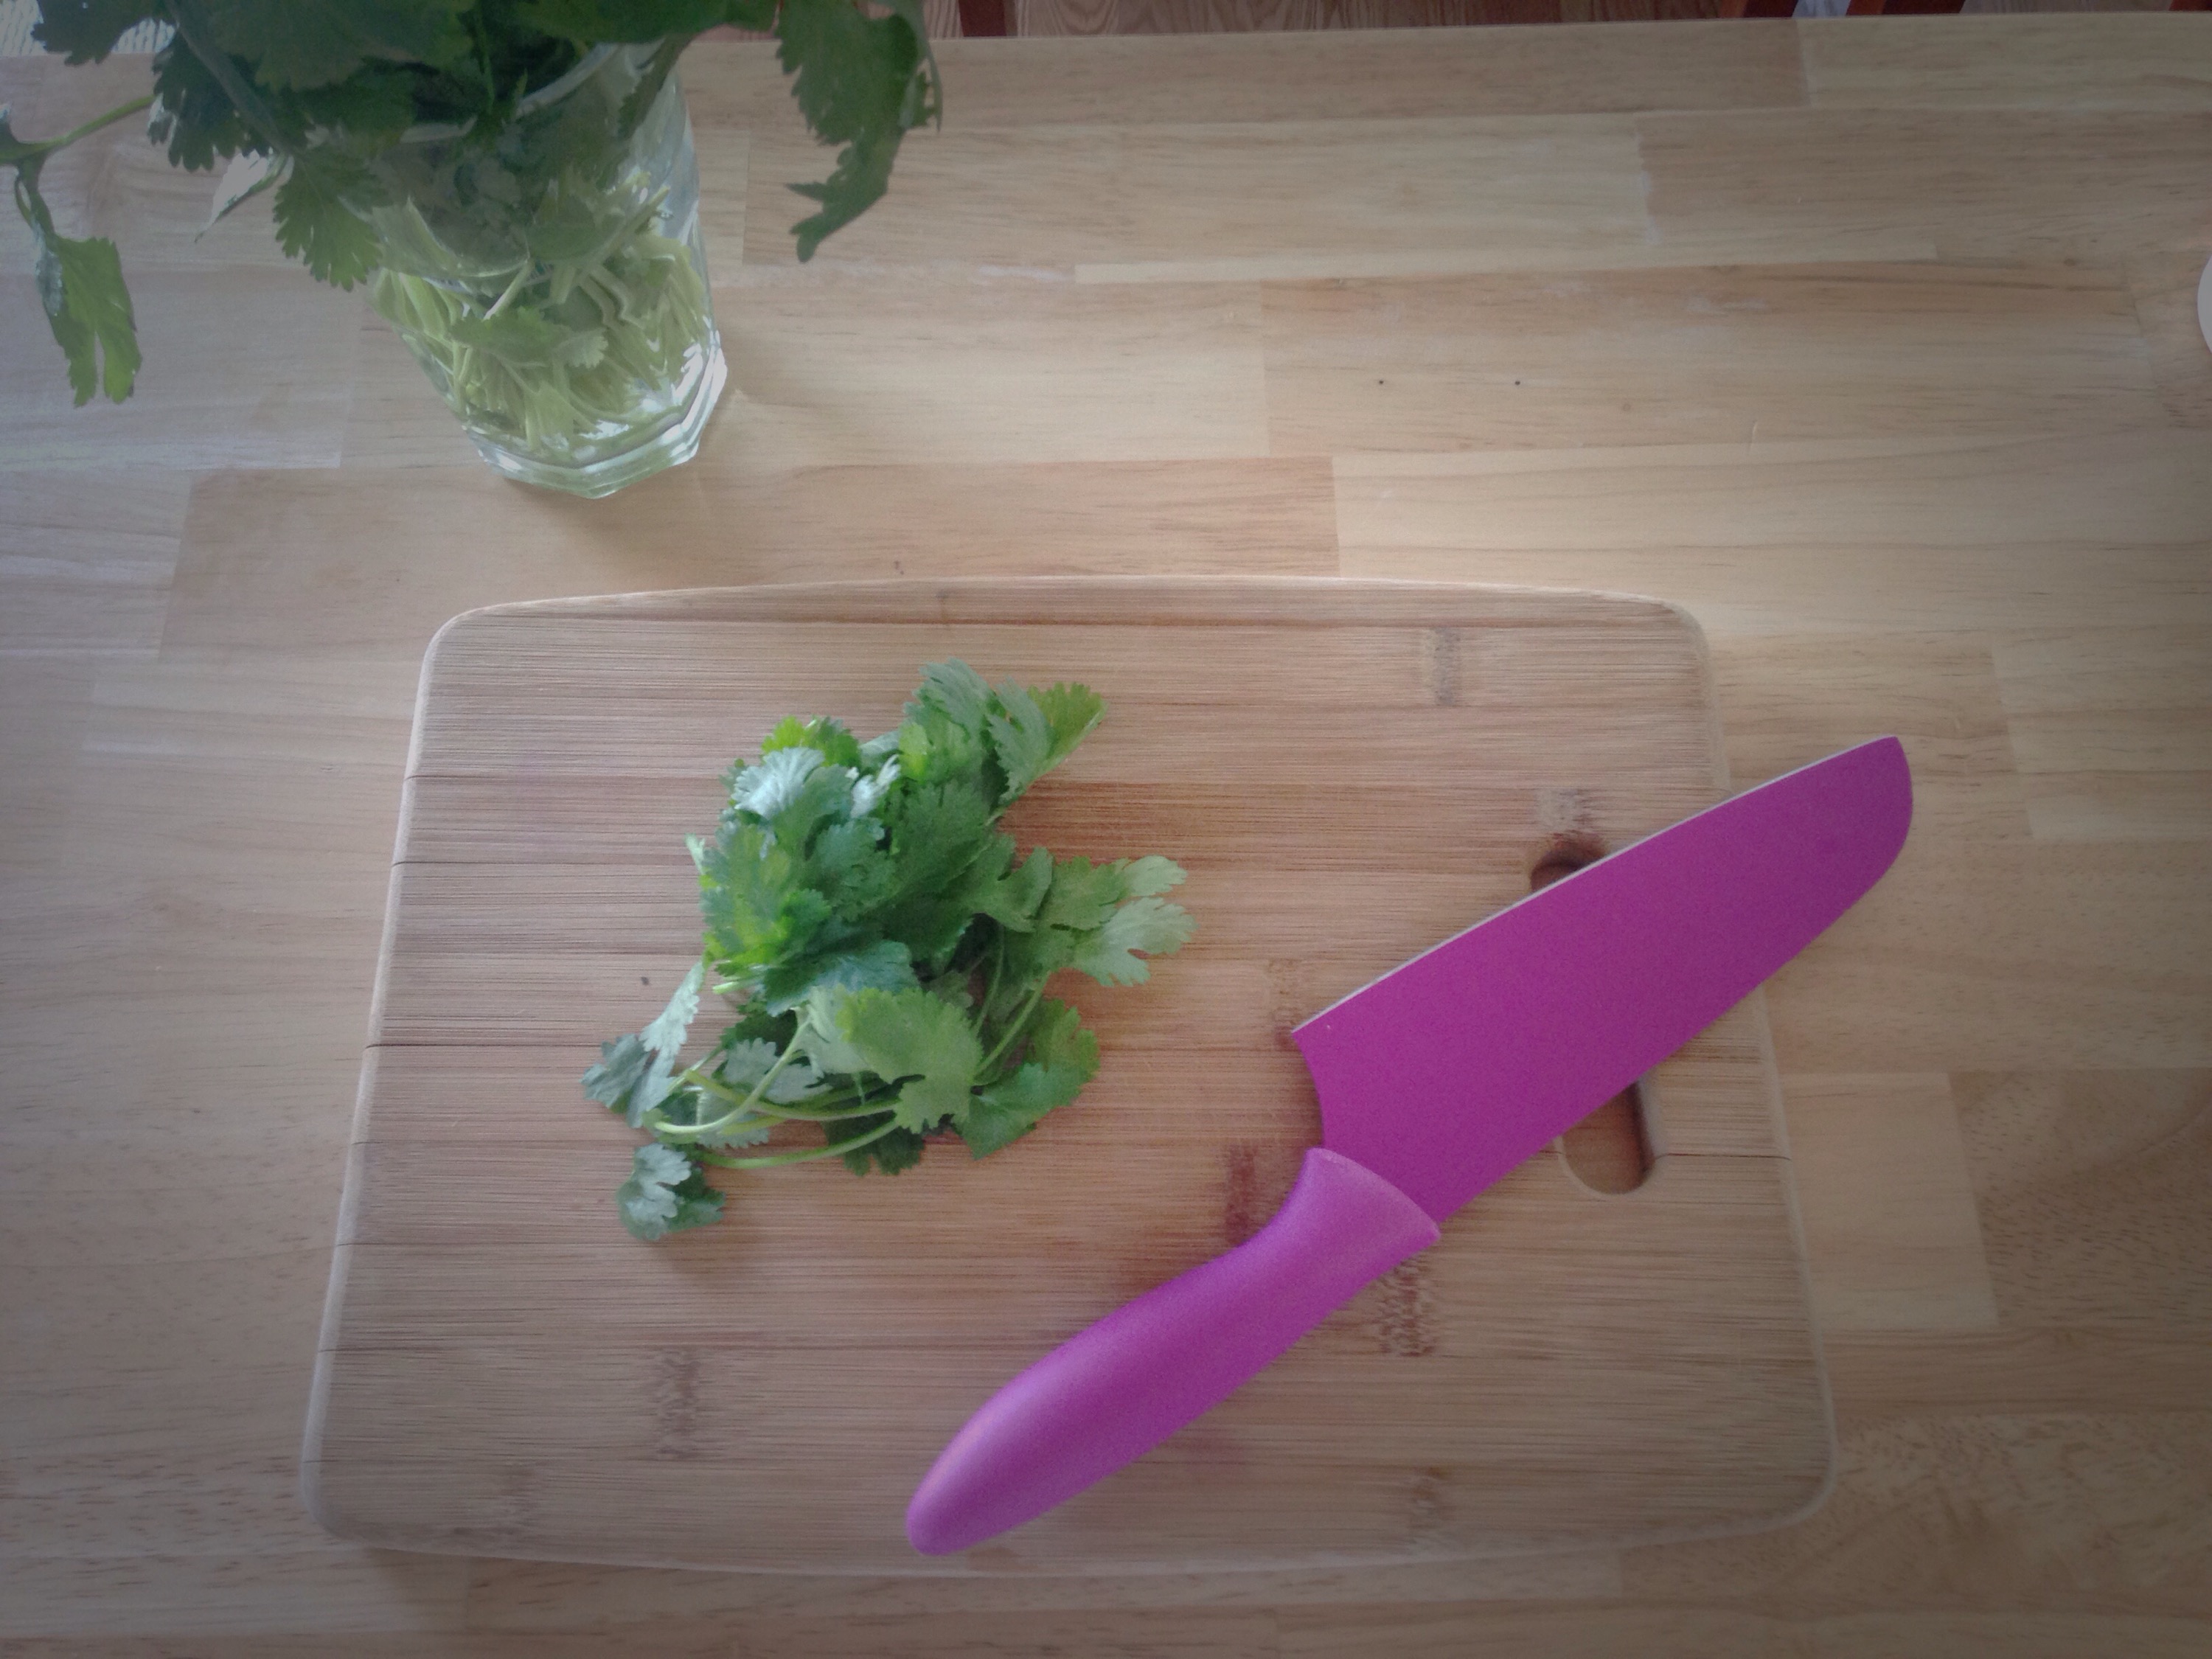
All things magical happen when you use fresh herbs. Especially cilantro. This is going to be our sauce that we’ll add on top of everything.

IMG_7835

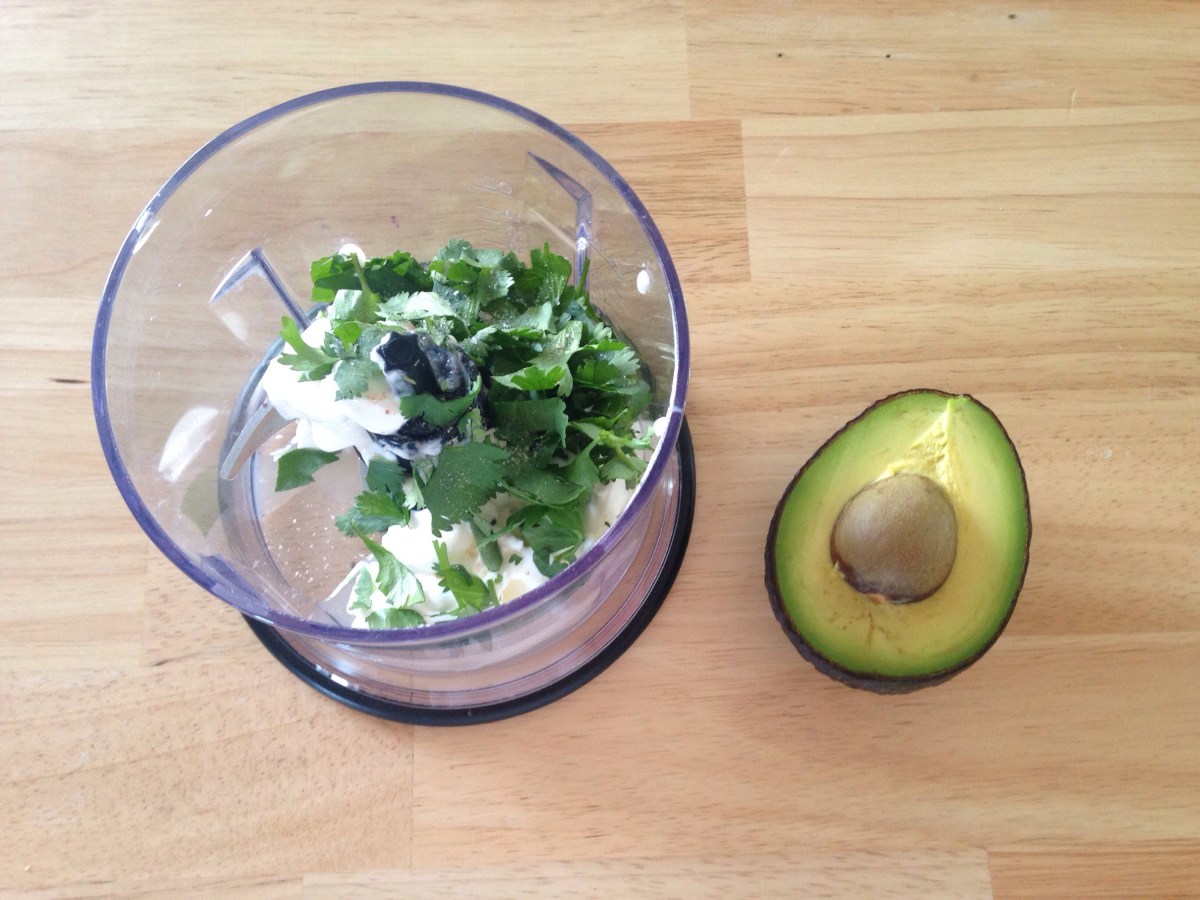
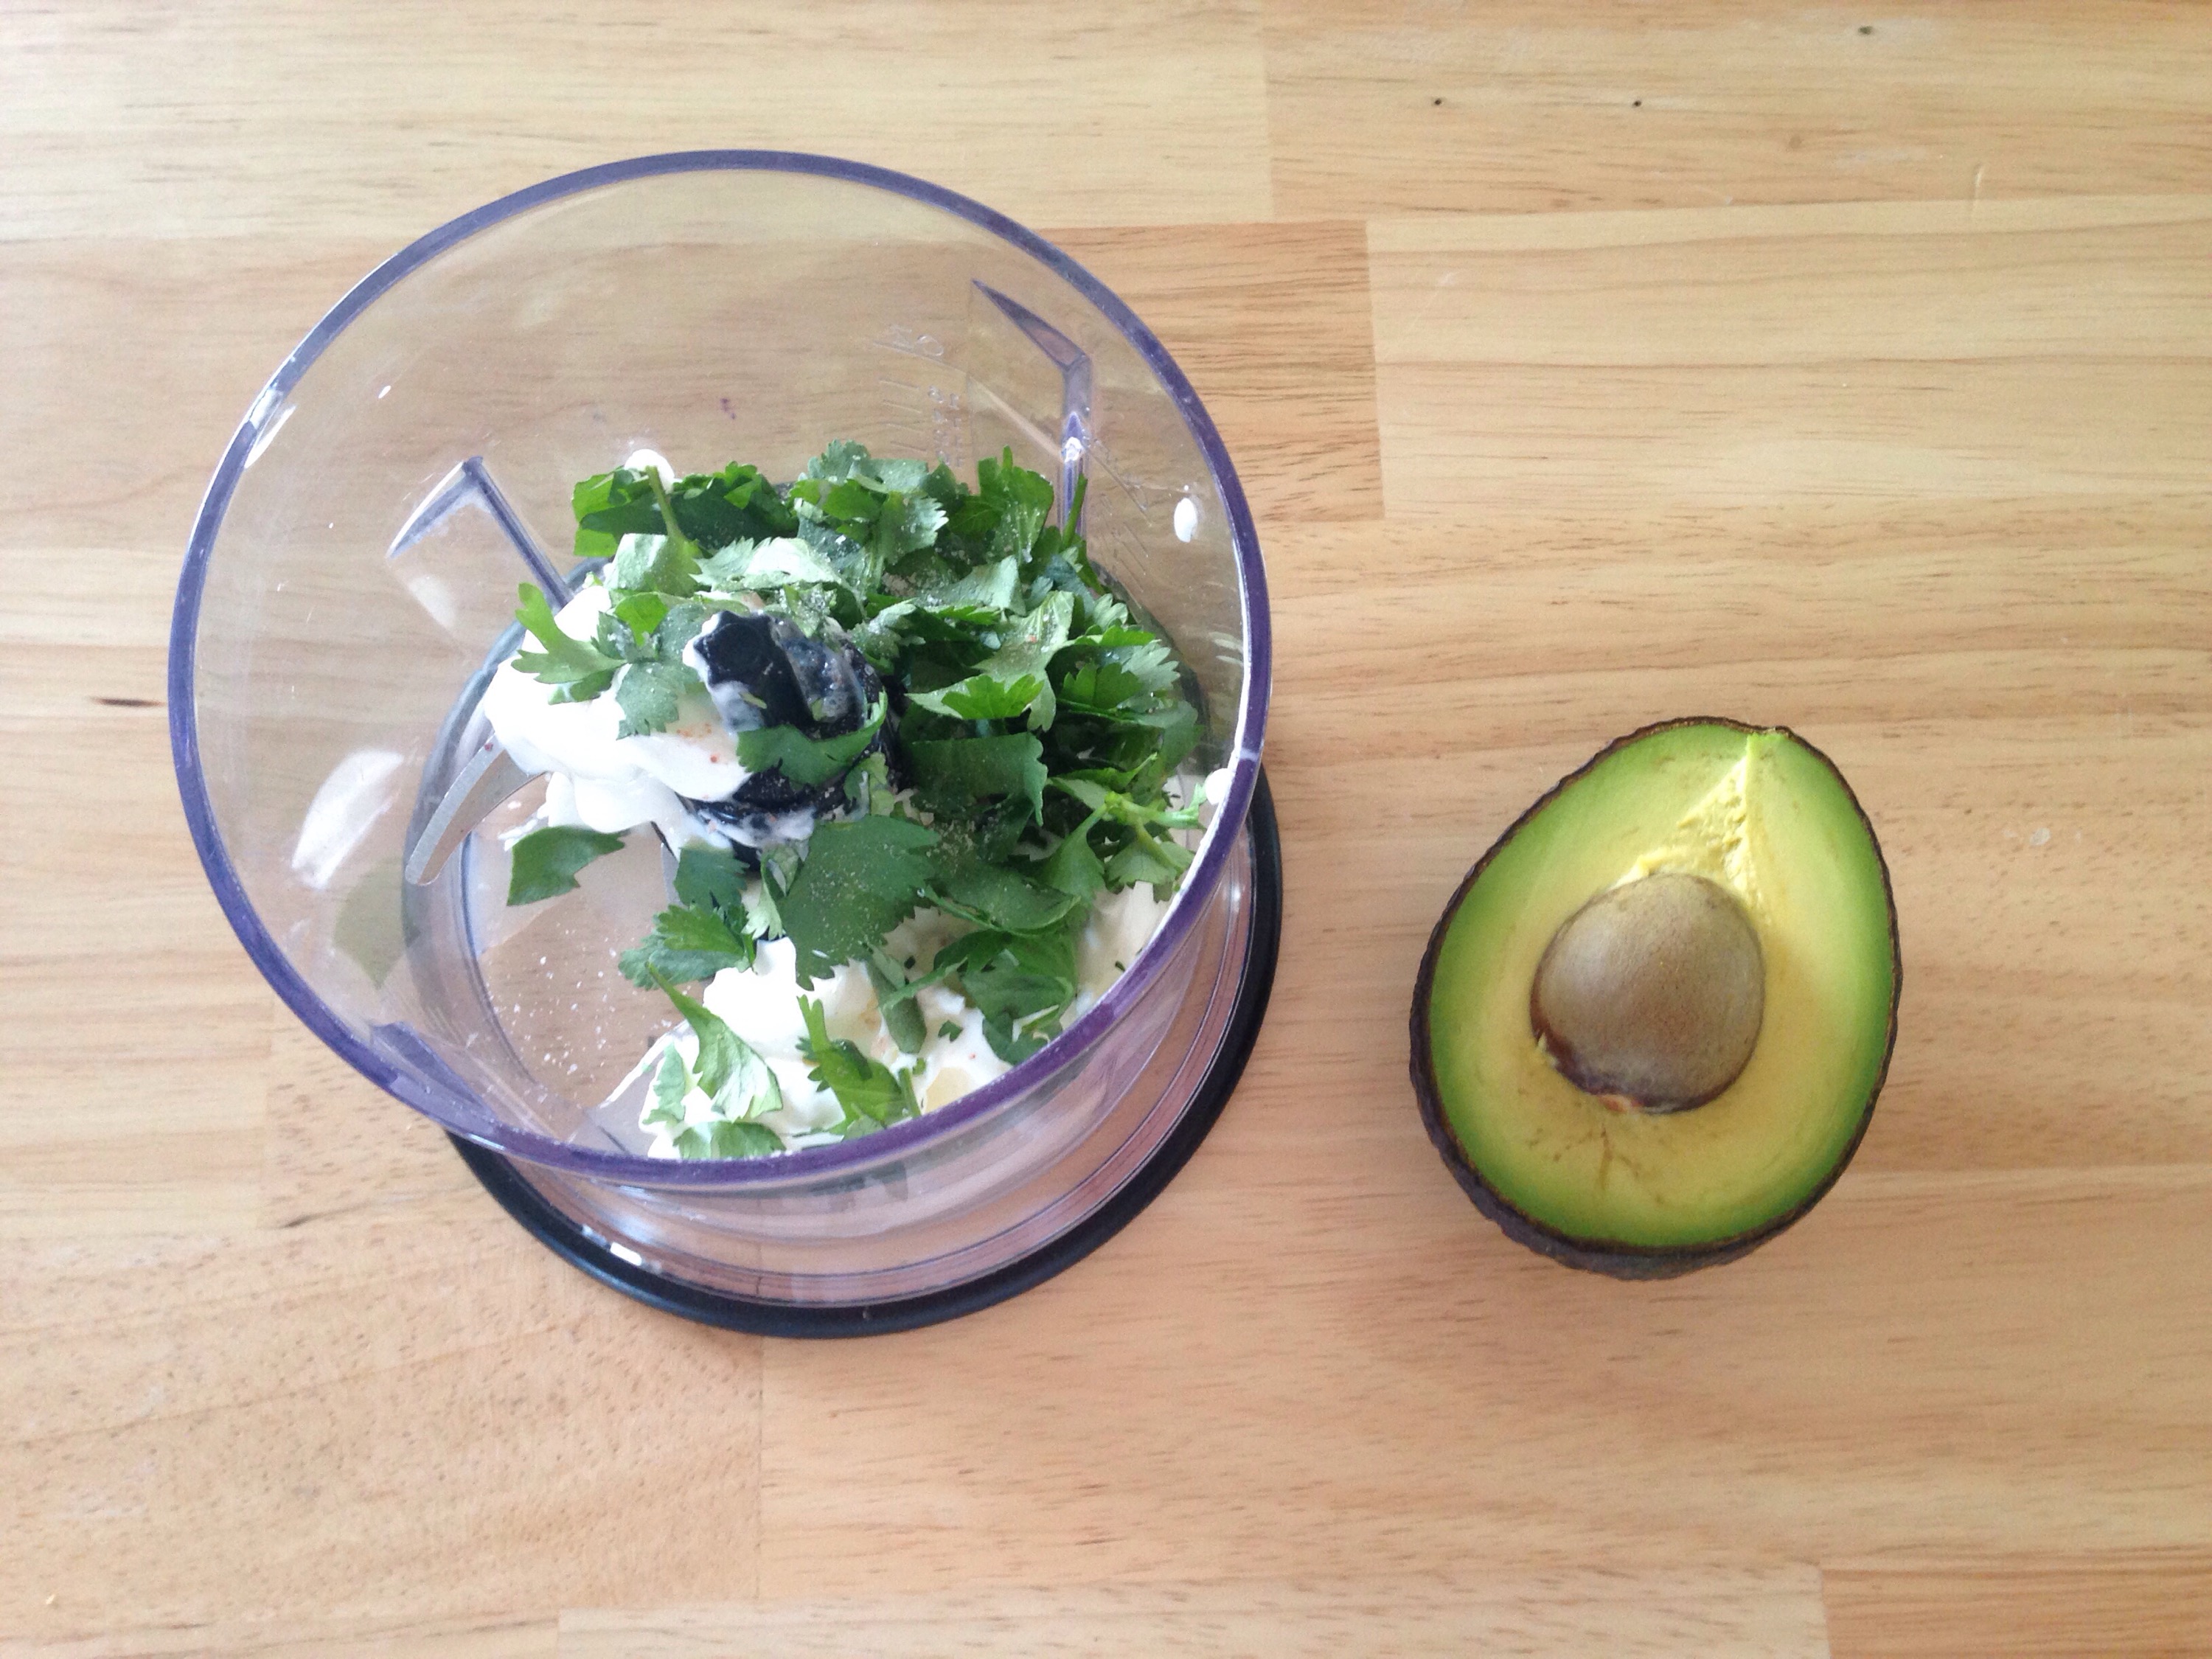
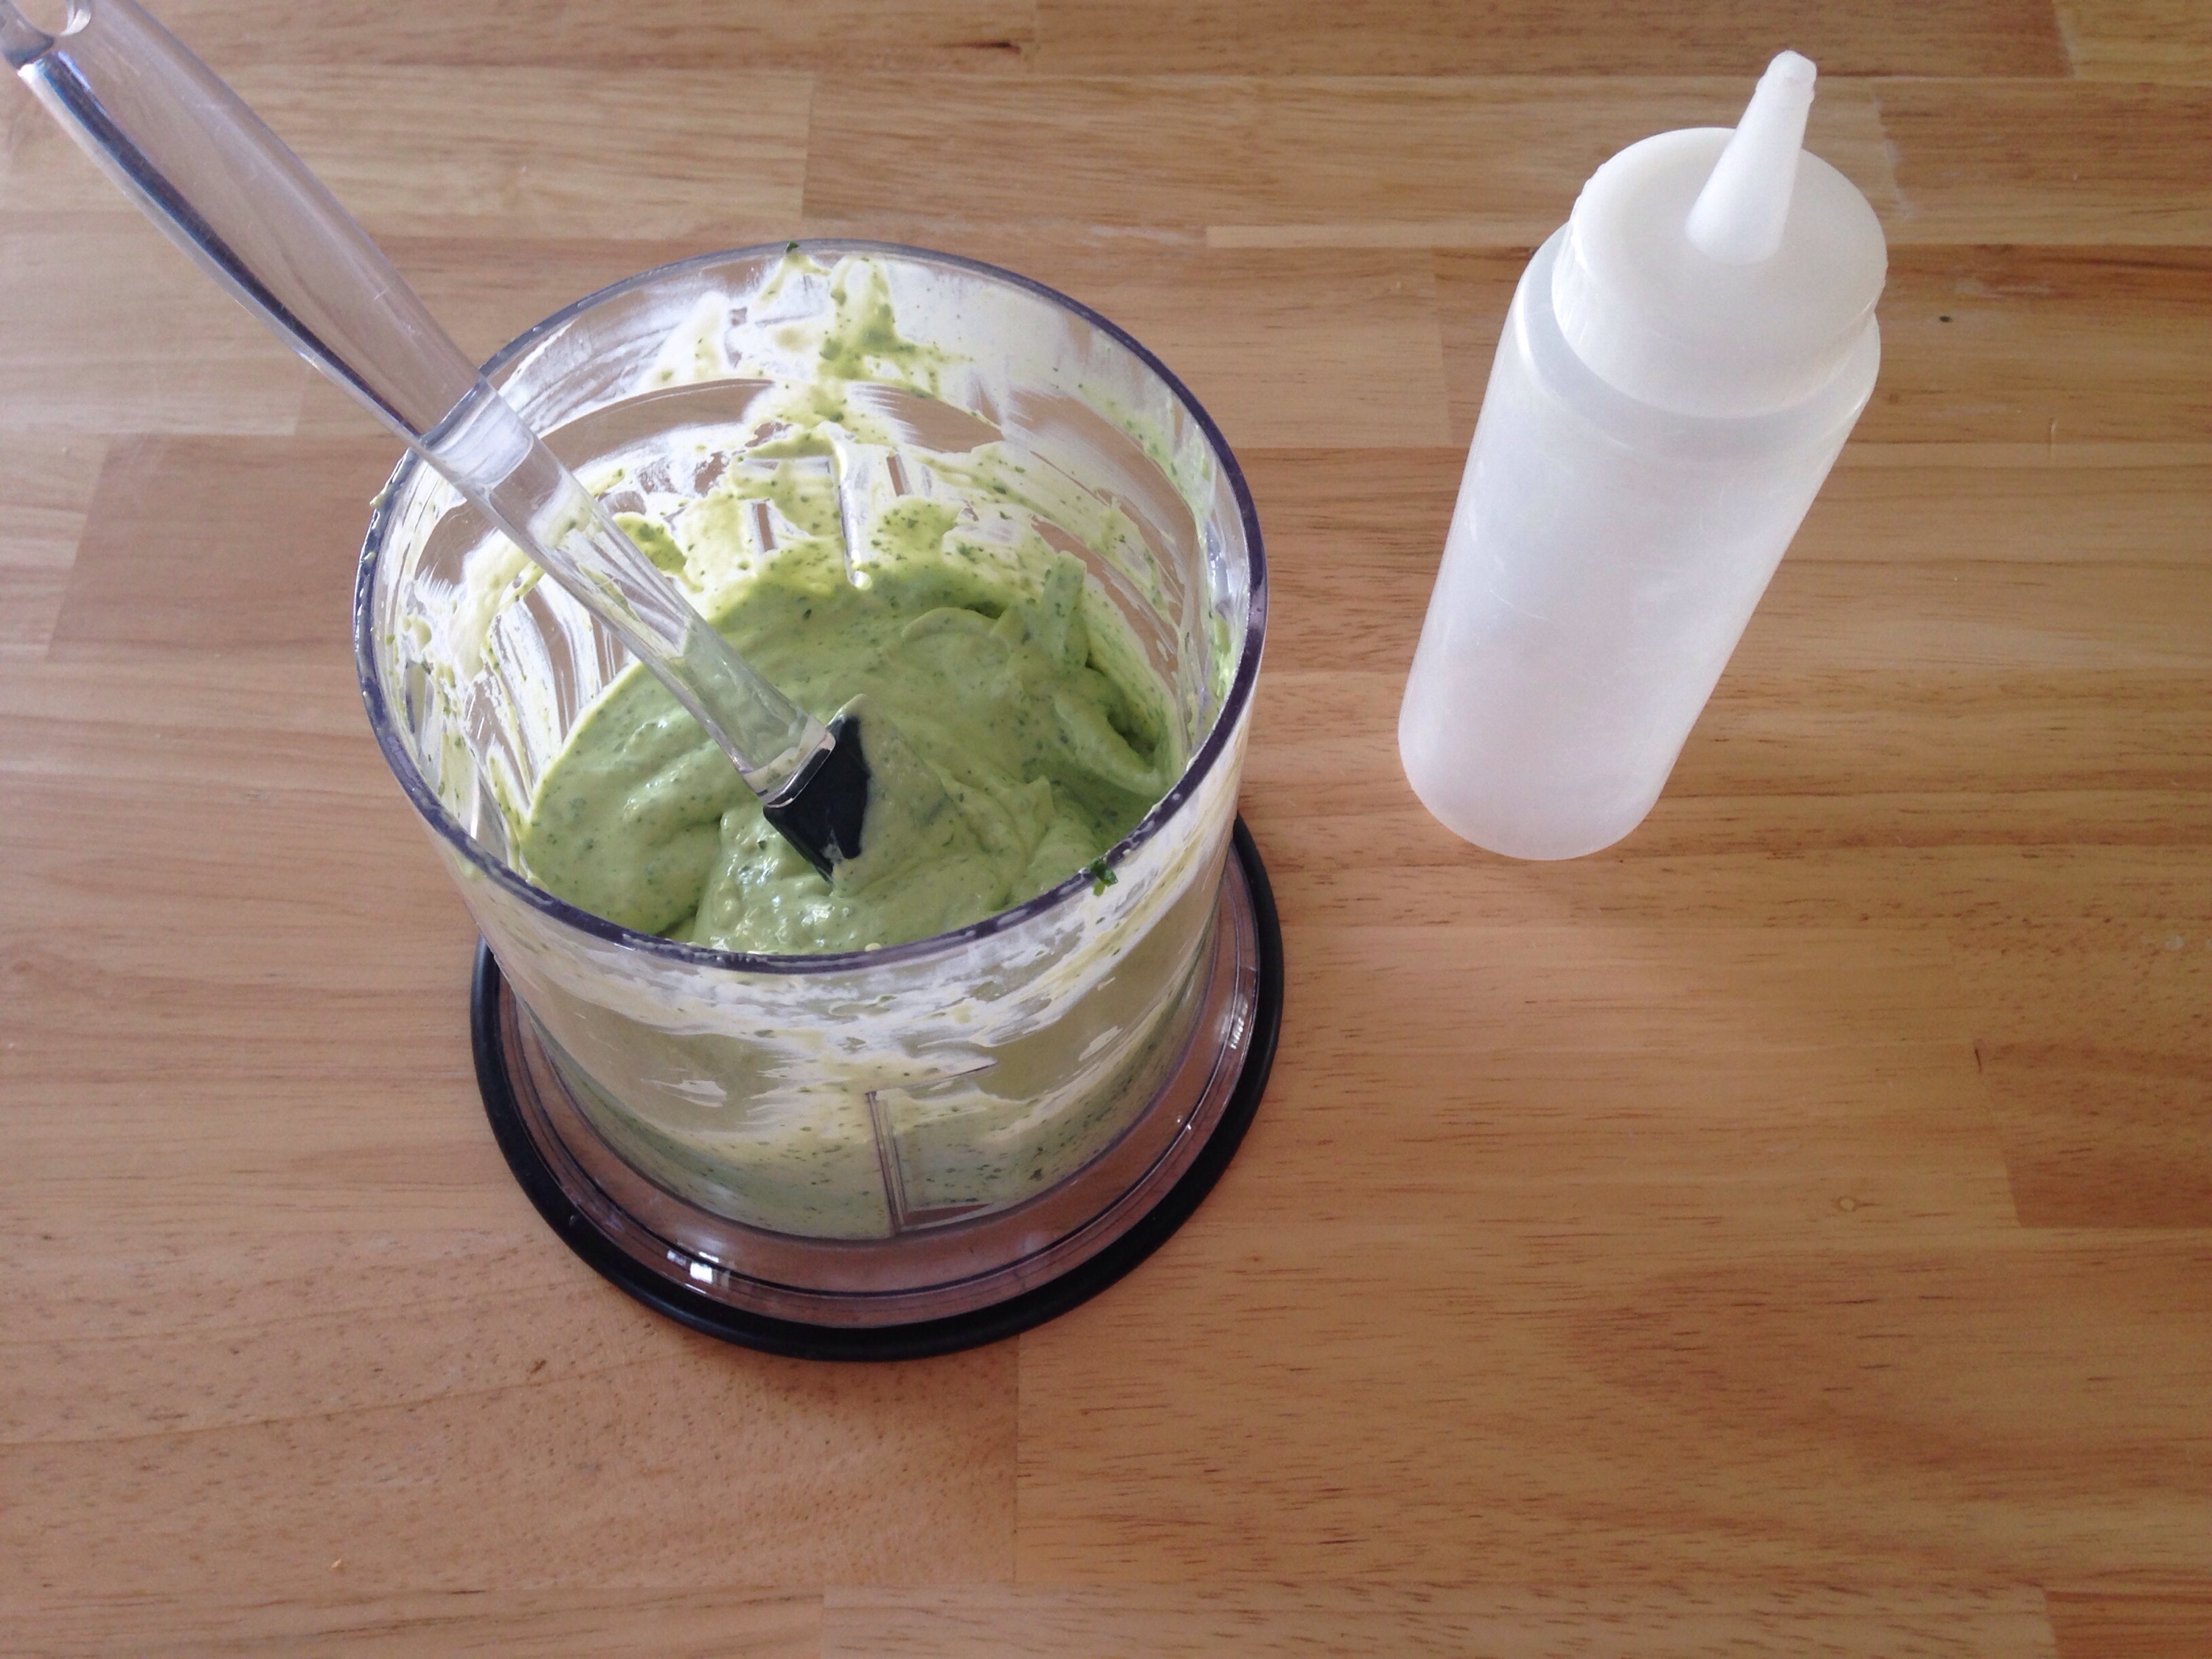
I roughly chopped a handful of cilantro and added it to about 1/2 cup of sour cream, a couple tablespoons of lime juice and one half of an avocado. Blend until smooth. I added a couple tablespoons of water to help break it all up.

IMG_7837

Putting it into a squeeze bottle is totally optional. I feel that it makes it easier at the end when I’m putting the pizza together.

IMG_7834

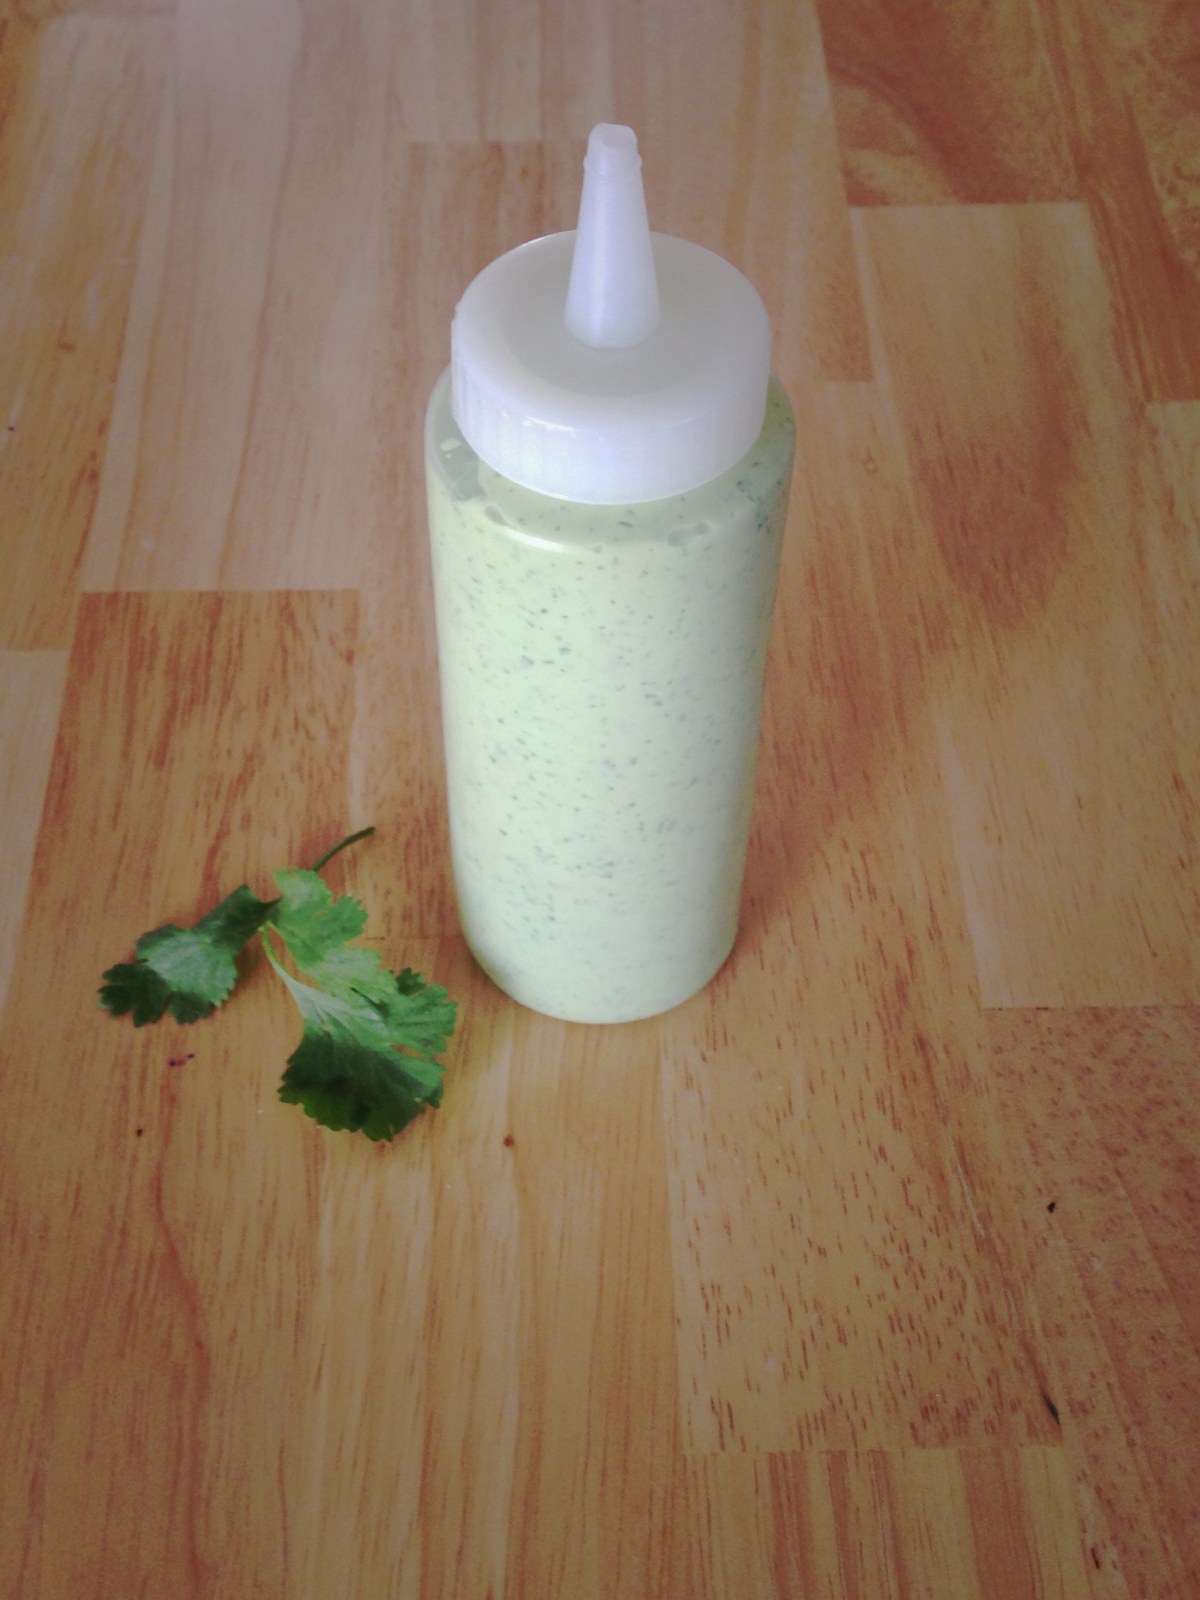
I might need to make more, because this bottle is going to get eaten all by myself. yuuummmmmm

IMG_7836

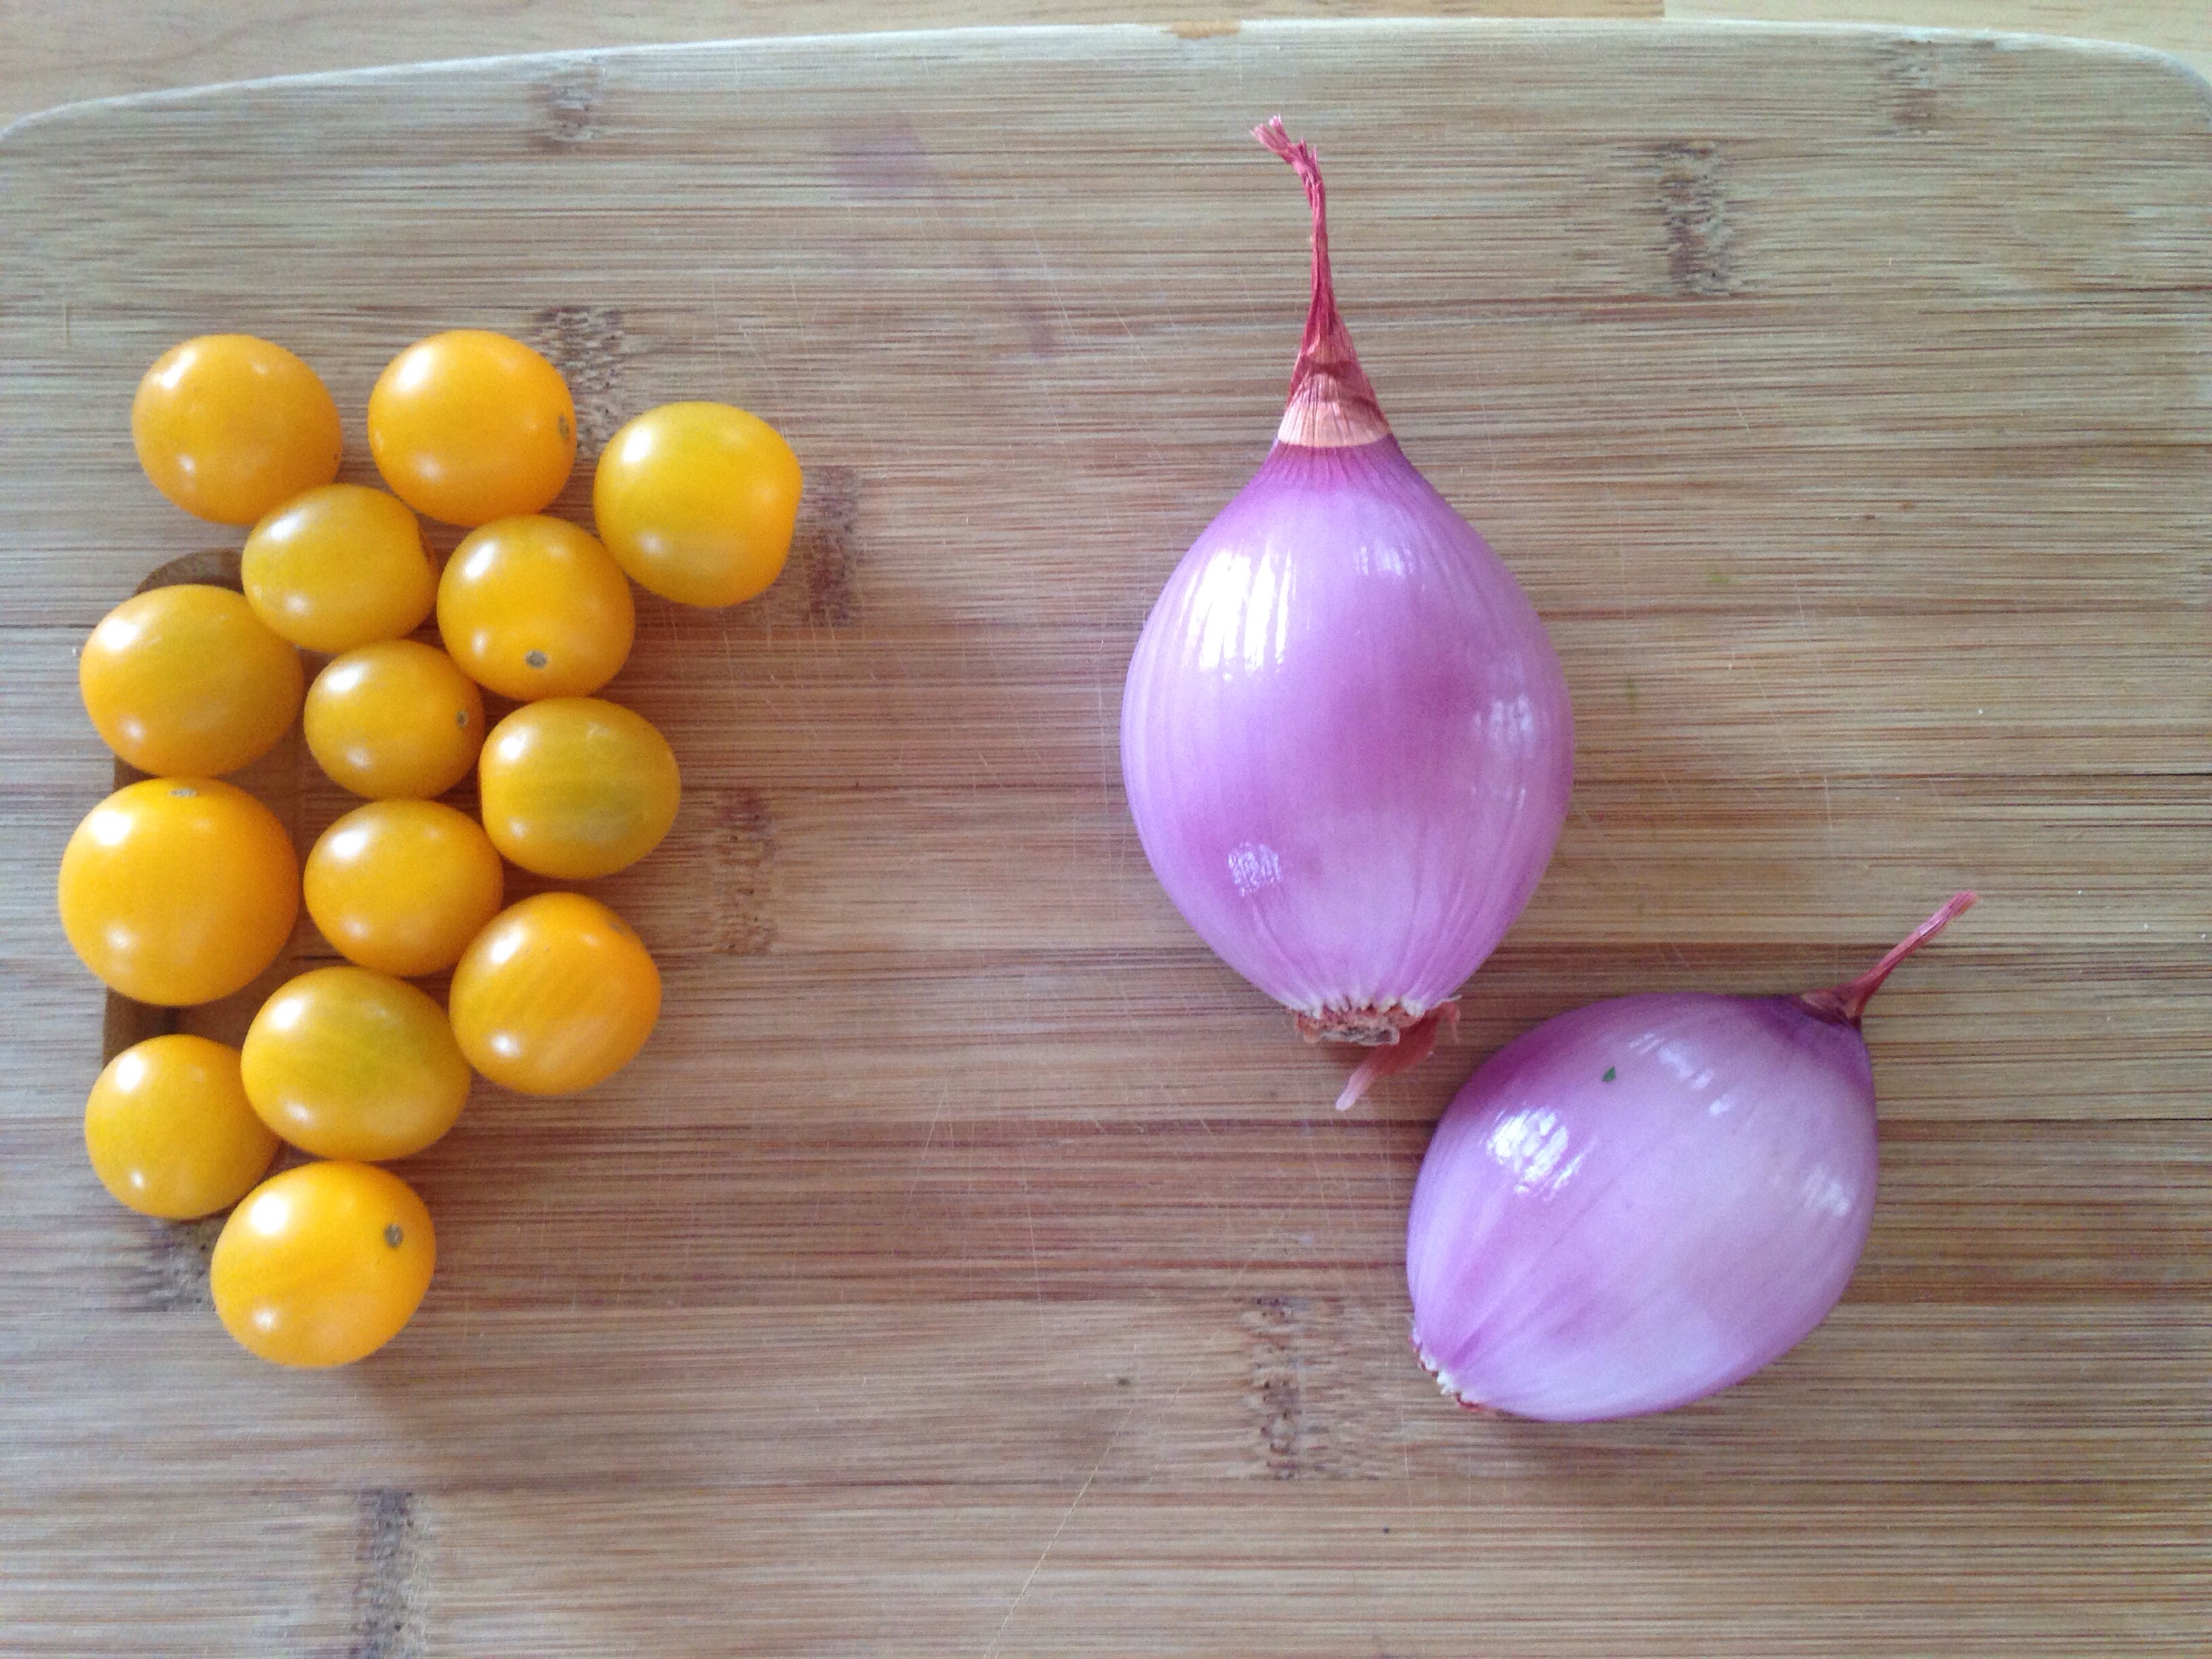
Chopped shallots and yellow tomatoes are my “salsa”. You can use any onion or tomato. I prefer shallots, they are a bit sweeter and once yellow tomatoes are in season, that’s the only tomato I buy.

IMG_7842

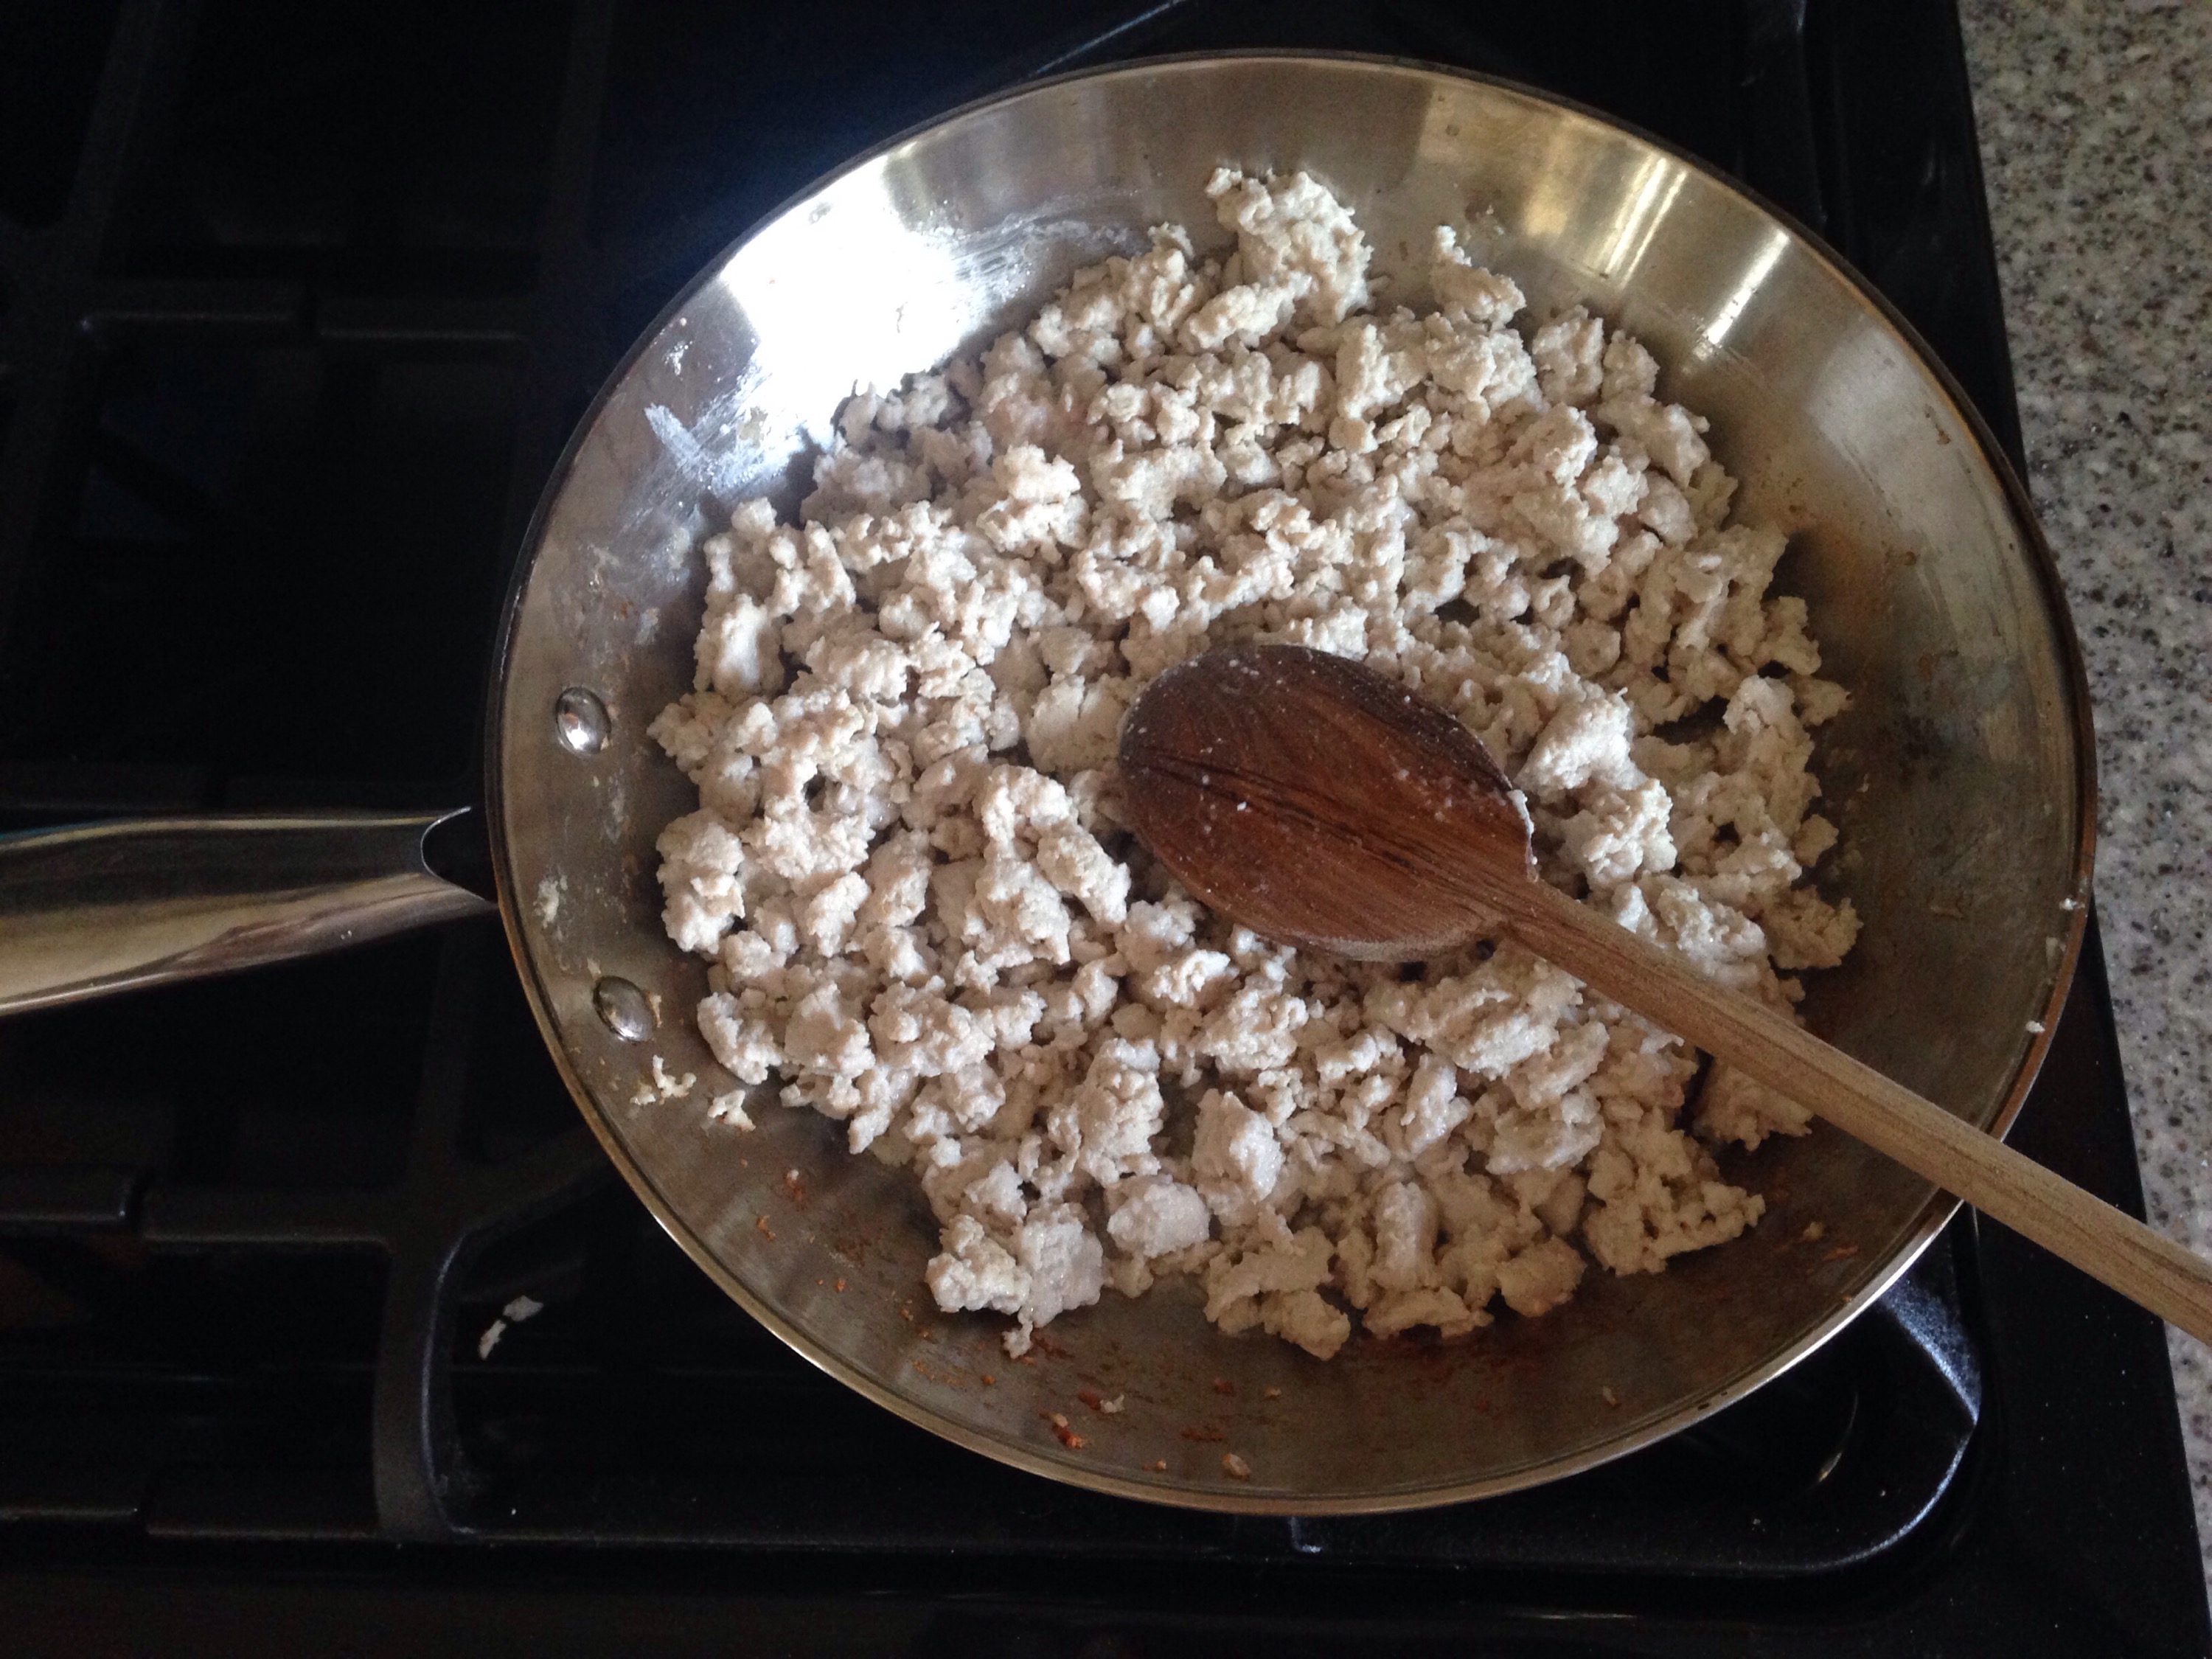
I browned a pound of ground turkey and once cooked, added taco seasoning and prepared the meat just as I would for actual tacos.

By this time, I can prepare my crust and prep my pizza. This recipe will make two pizzas. If you aren’t making two at that time, divide the dough in half and freeze or refrigerate for later. But if your like me, you’ll eat an entire pizza yourself and you need to make two to feed everyone else.

IMG_7843

Lightly flour your surface and roll your dough to desired thickness.

IMG_7844

Placed on greased pizza sheets and then brush the top with olive oil.

IMG_7845

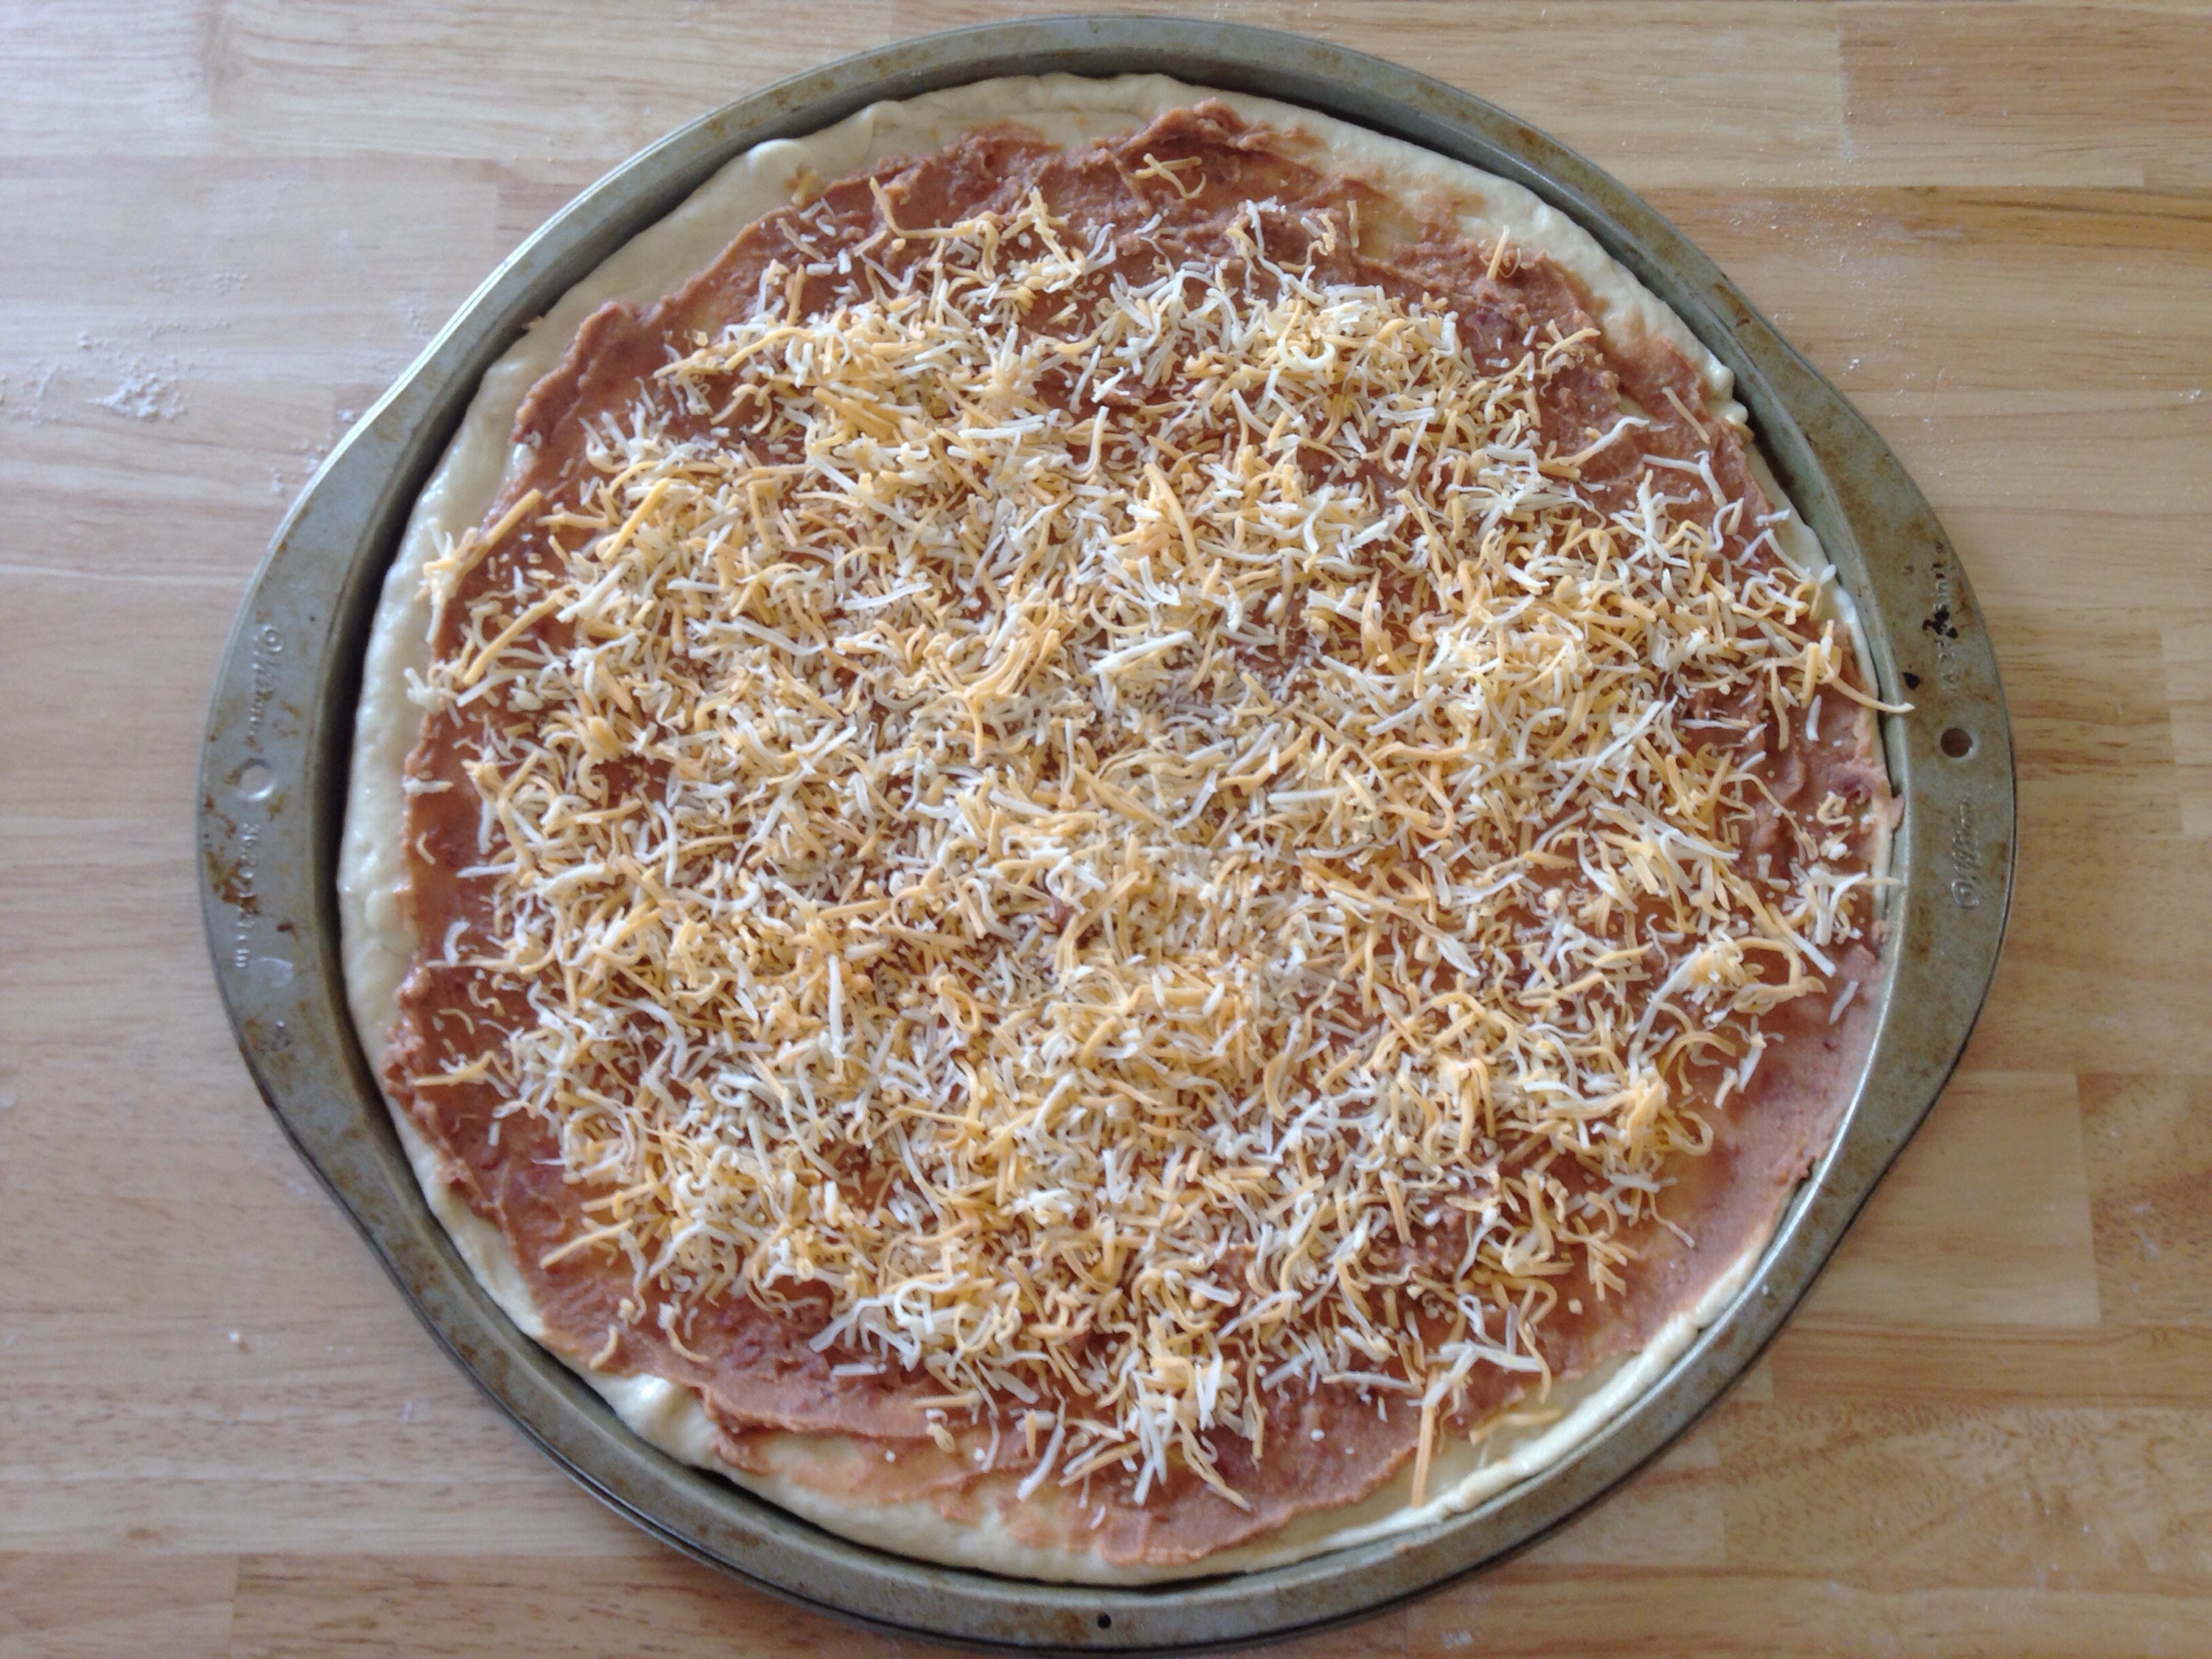
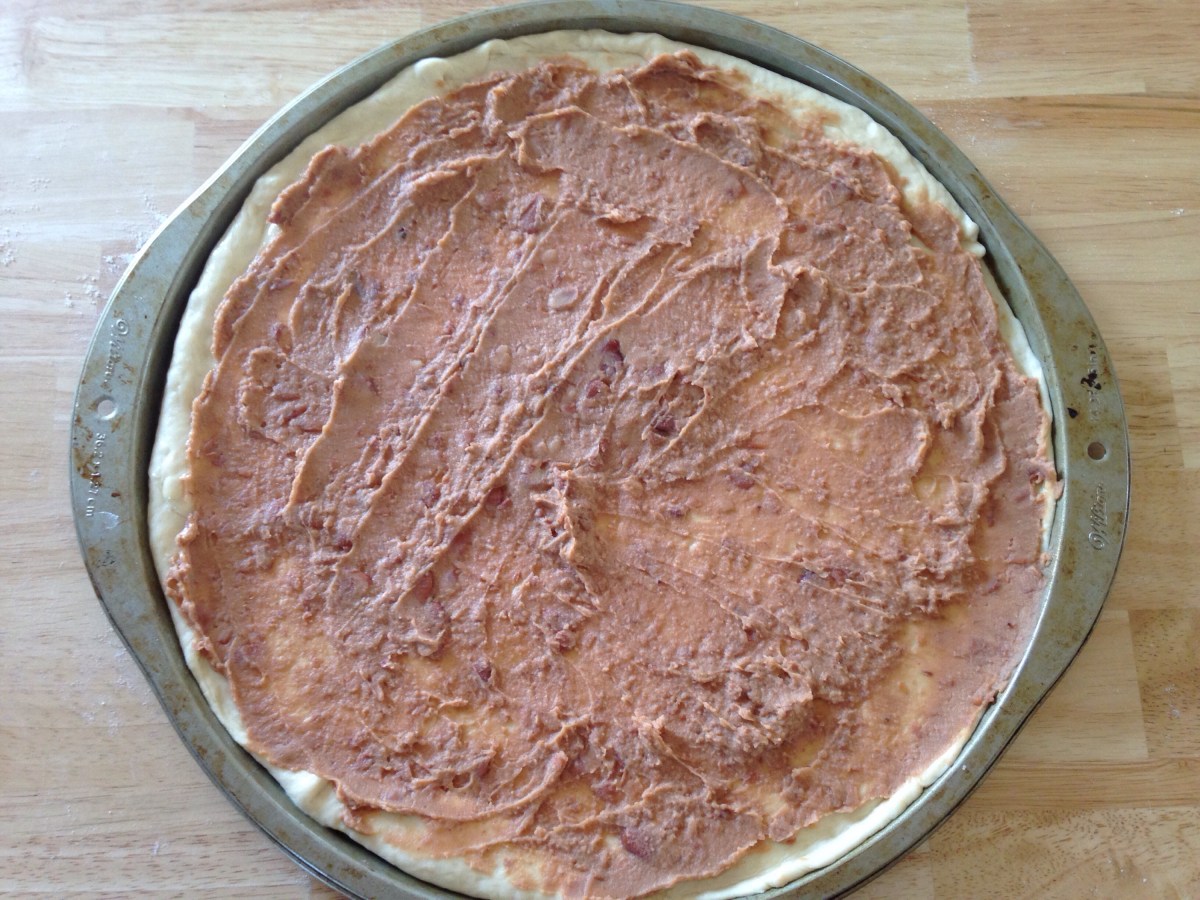
Now we top them. The base is really simple. A can of refried beans split between the two. I read a lot of recipes that called for a mixture of beans and salsa and I really prefer just beans.

IMG_7846

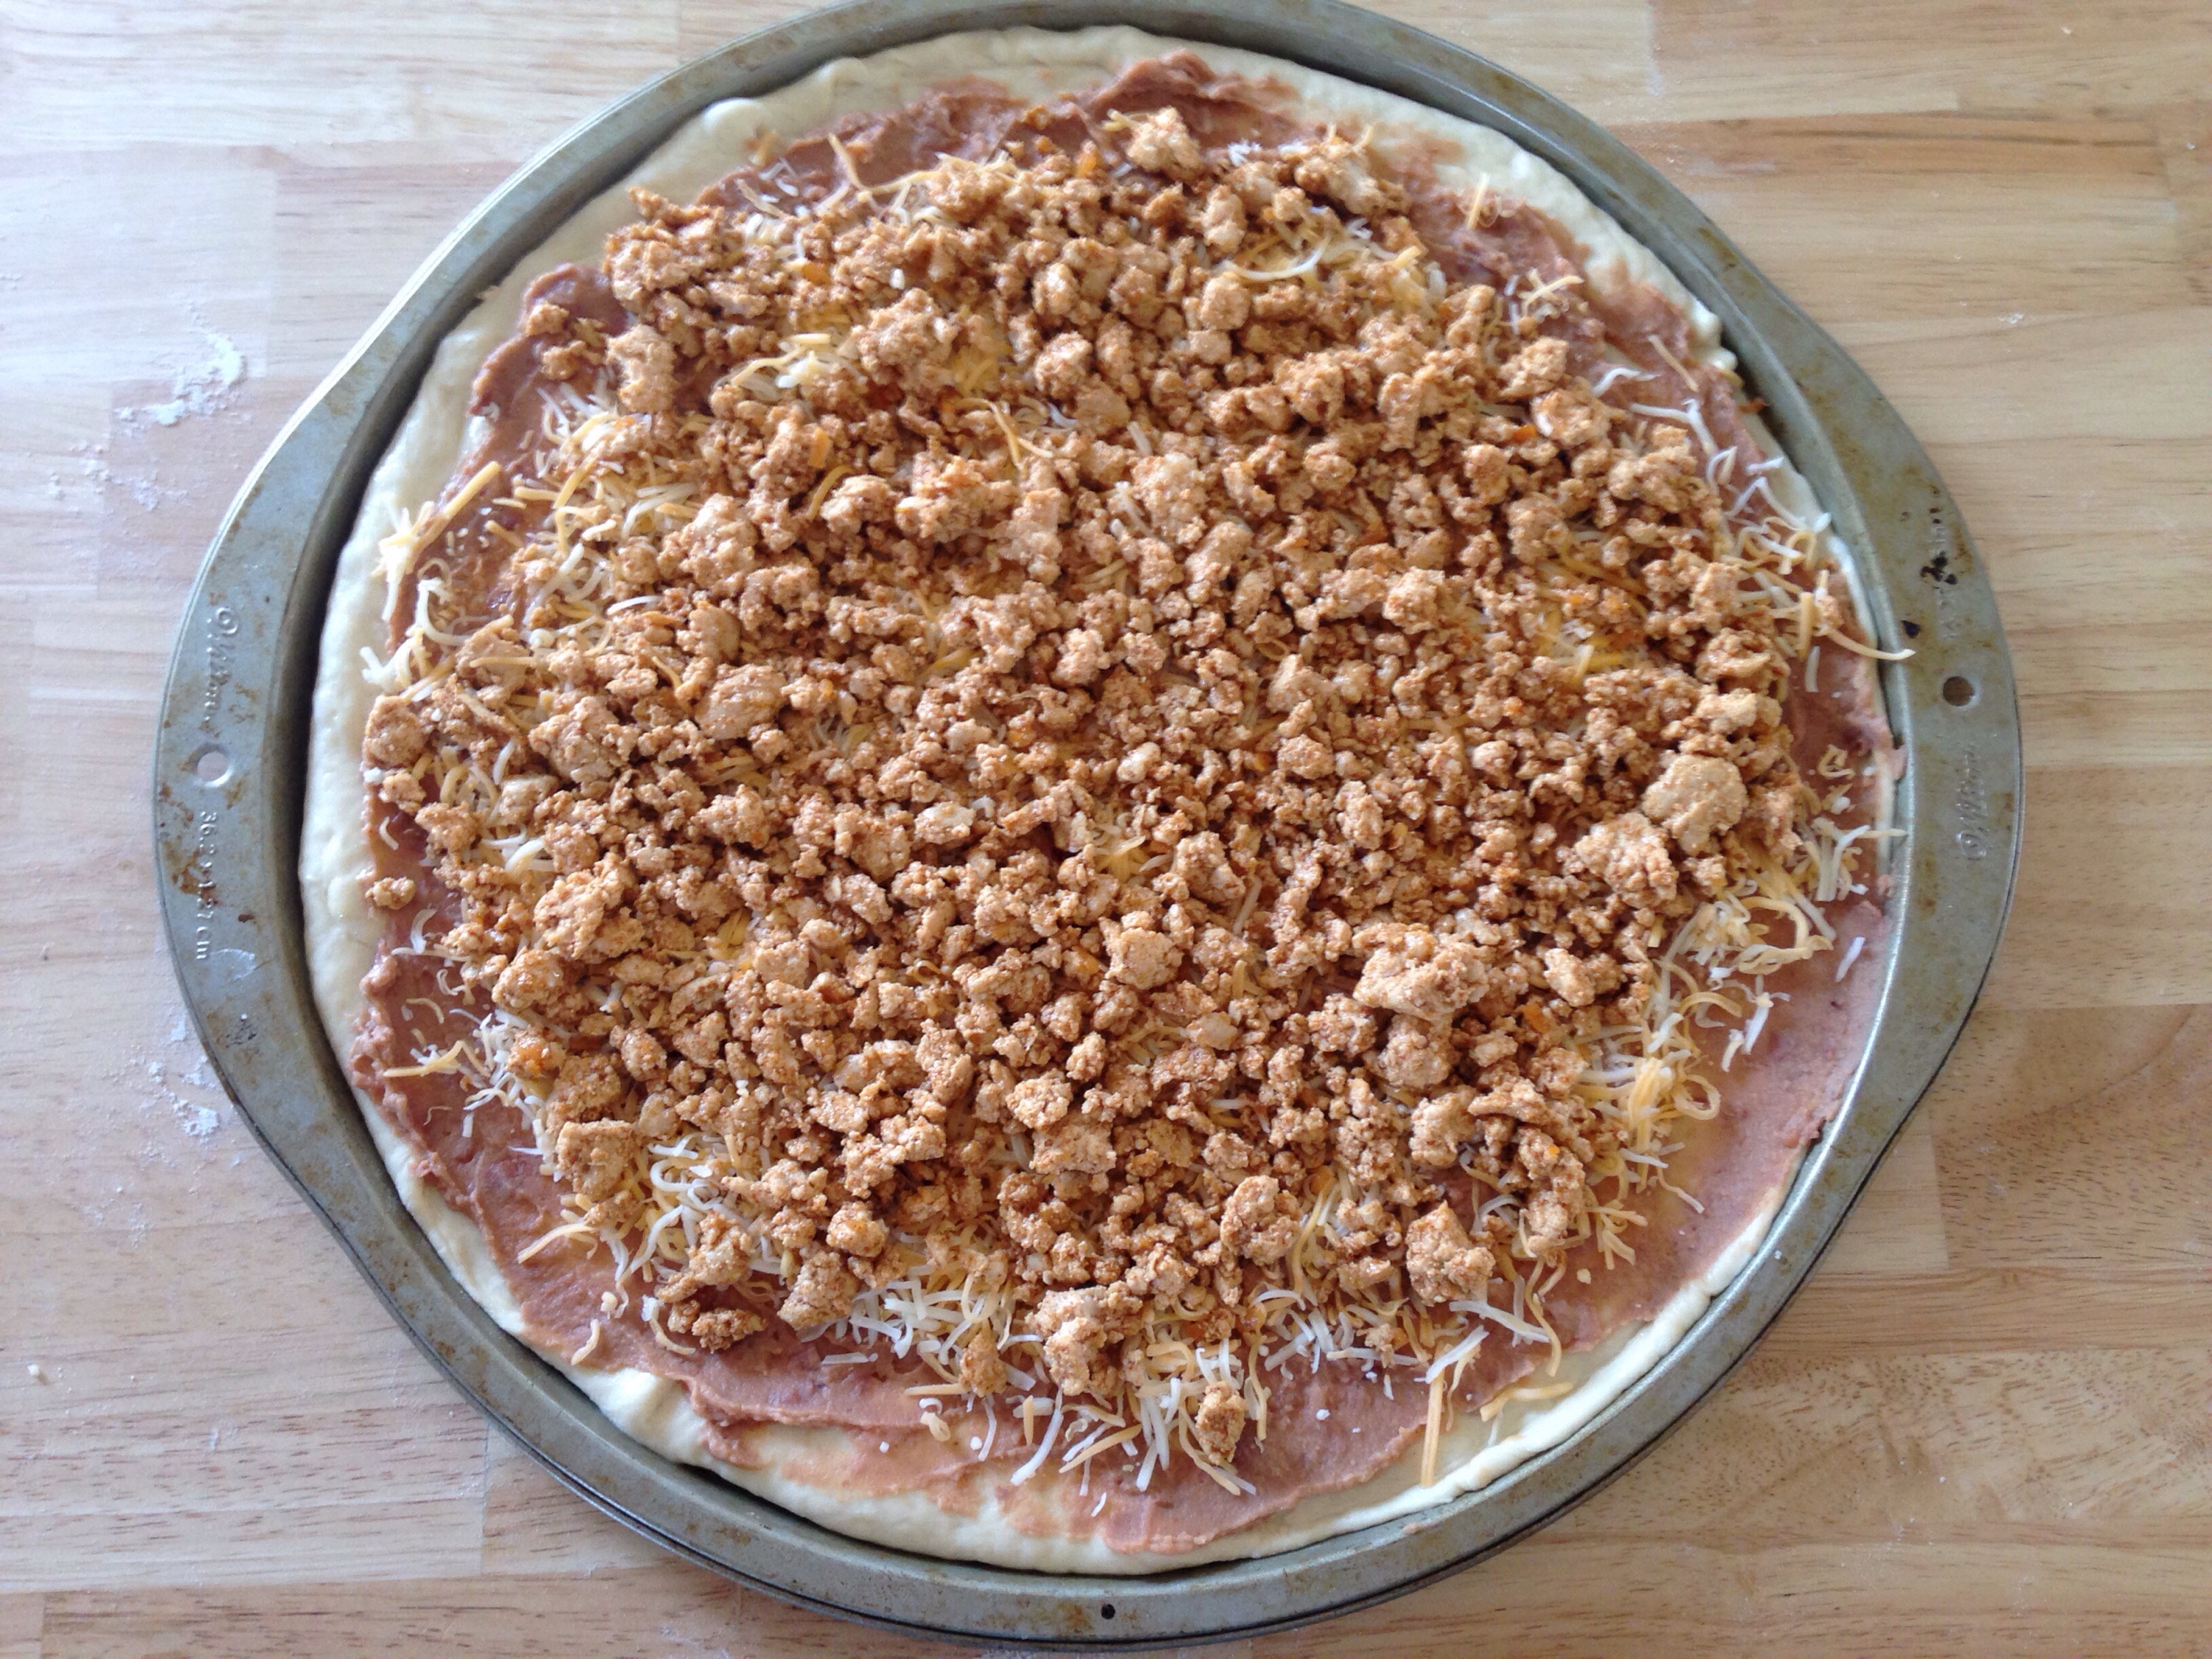
Next up, cheese. I used a bag of store bought shredded Mexican blend. I’ve also done one with just pepper jack and it was just as good.

IMG_7847

Top with your cooked meat. I prefer ground turkey, even for my tacos, but you can use ground beef if you like.

IMG_7848

 Cook in a 400 degree oven until browned, approx 15 mins.

Let your pizzas cool down a bit and top with shredded lettuce. I used a bag of pre shredded iceberg lettuce, I like the crunch of it best.

Add your tomato shallot mix and drizzle your sauce over it.

IMG_7866

IMG_7867

Now excuse me while I got back for seconds. Oh, who am I kidding? Fourths….

Deluxe Taco Pizza

dough:

1 1/8 cup warm water

2 1/4 tsp (1 pkg) active dry yeast

3 cups all purpose flour

2 tbsp olive oil

1 1/2 tsp salt

toppings:

1 can refried beans

1 lb cooked ground turkey or beef

1 bag shredded cheese

chopped lettuce

chopped tomato and onion

sauce:

1/2 cup sour cream

2 tbsp lime juice

1/2 avocado

cilantro


sweet potato brownies

I really love being in the kitchen. Cooking and creating and trying new recipes are my way of relaxing. Plus, the end result pays off with something tasty.

Who doesn’t love brownies?!?! Two of my favorite brownie recipes involve black beans and zucchini. They help with that sweet tooth but cut down on the “bad stuff” and it’s fun to make people guess the secret ingredient.

So today’s brownie fix is going to be with sweet potatoes. I started by roasting a few in the oven this morning. I put mine in a 375 degree oven and went on my way with my morning coffee and 63 loads of laundry. It will take at least an hour depending on how big they are, so you can even do this part the day before.

I let mine roast just under an hour and half, let them cool and scooped out the goodness.

IMG_6911

I got about 2 cups from them, which for the recipe you’ll only need 1 1/2 cups. Reid loves sweet potato mash so looks like dinner is already ready for him.

Now you just need a few more ingredients.

I measured out my cashew butter and warmed it a bit so it was easier to blend. My favorite part of recipes like this are the fact that they come together so easily. No flour to sift or exact measurements needed. Brownies are forgiving.

Pour your batter in a greased 8×8 pan and bake for 20-25 minutes in an oven preheated to 350 degrees. I added some dark chocolate chunks to mine right at the end as well. That’s optional, but I mean, why wouldn’t you?!

The hardest part of this will be letting them cool long enough. And not sticking your finger in them, woops.

IMG_6913

They turned out moist and fudgy and incredibly delicious. I mean just look at them…

Now excuse me while I hide from my children in the closet. With this plate.

chocolate quinoa cake

I did a previous post making two desserts that featured legumes. Is that right? Black beans and chickpeas are legumes, I think. Anyway, they are among a few healthy recipes that I’ve tested and loved. Now I have one more to add to the mix. Chocolate Quinoa Cake. In place of flour you use cooked quinoa. Lucky for me, I had an overload of it since I accidentally doubled a recipe and had an overflow of the little grains around.

quinoa

It looks like rice krispie treats but it’s really not. I wish. Hey, I wonder if you could make them with quinoa? Probably not. Moving on.

ingrediants

Most everything needed for this cake I had on hand, with the exception of coconut milk, which I needed for the frosting. The most delicious frosting.

In a blender or food processor, you’re going to combine eggs, almond milk, and vanilla. Add in your cooked quinoa, melted coconut oil, and butter and blend until you get a smooth batter. Relatively smooth, it won’t resemble a box cake batter.

blender

Sift together your dry ingredients in a bowl. Cocoa, sugar, baking powder, soda and salt. Add your blended ingredients and mix until well combined. Pour into your greased cake pans and put in your preheated 350 degree oven. Bake for 30 minutes.

oven cake


Now onto the amazing frosting. I would use this frosting for most anything else as well, and it can have so many variations. It takes just a little planning ahead, but having only two ingredients makes it so simple.

choc frost

You’ll need to stick a can of coconut milk in the fridge the night before, allowing the solid coconut to form at the top. You’ll open and scoop out this part into a bowl of chocolate chips. (No need to toss the rest, just stick in the fridge and use for other recipes)

can of choc

You’ll melt and stir, slowly. I did really small increments in the microwave but you could use a double boiler method if you prefer. Once melted and combined, allow to cool briefly then stick in the fridge for several hours to thicken back up. You’ll then remove and beat with a mixer until it reaches the consistency you like. Do your best to not eat most of it out of the bowl. Save some for the cake.

Once your cakes have cooled, remove from the pans and allow to rest and cool a bit longer. I used parchment paper which made handling so much easier since this cake is more fragile than a standard flour cake.

cooled

From here on out you can probably figure out the rest. Make sure your layers are cool and it’s best to whip your frosting right before frosting your cake because once this frosting sits it starts to harden up again.

cake stand 3

final

I love this cake so much. It has all the elements of a delicious chocolate cake while making you feel a little bit better about yourself since it’s not loaded with all the “bad stuff.” I use quotes because I’m a big fan of the bad stuff so I don’t really think it’s bad. Those of you that are gluten free, this guy is right up your alley.

plate

This cake will fool the strictlers, wow your guests when you tell them what’s in it, and just might make the nay sayers change their mind about that silly little grain that most people can’t pronounce. KEEN-WAH. You’re welcome.

Chocolate Quinoa Cake

2 cups cooked quinoa

1/3 cup unsweetened almond milk

4 whole eggs

1 tsp vanilla extract

1/2 cup butter, melted

1/4 cup coconut oil, melted

1 cup evaporated cane juice sugar (or whatever sugar you prefer)

1 cup cocoa powder

1/2 tsp baking powder

1/2 tsp salt

13.5 oz can full fat coconut milk- for frosting

10 oz bag chocolate chips- for frosting

tester23


Black Bean Brownies and Chickpea Chocolate Chip Cookies

Ready for some recipes that sound weird?!

I love new recipes and usually test out new desserts as often as I can. I’m definitely not above a cake recipe that asks for 3 cups of butter or a batch of cookies that has 14 different kinds of candy in them. But the ones that call for vegetables seem to always entice me. If you haven’t tried Red Velvet Cupcakes made with beets you are missing out. These are two of the recipes that are tried and true. I’ve made these brownies for several parties and they get gobbled up fast.

Black Bean Brownies adapted from Chocolate Covered Katie

You’ll need:

1 1/2 cups rinsed black beans (15 oz can)

2 tbsp. cocoa powder

1/2 cup oats

1/4 tsp. salt

1/3 cup honey

1/4 cup coconut oil or vegetable oil (coconut oil tastes much better in my opinion)

2 tsp. vanilla

1/2 tsp. baking powder

1/2-2/3 cup chocolate chips- your choice of dark, milk, semisweet

black beans

This is the easy part. Take all your ingredients, except the chocolate chips, and throw them in the blender. I melt my coconut oil a bit before hand so it all blends much easier.

Preheat your oven to 350 degrees. Sorry, should have told you that sooner.

Pour batter into greased 8×8 pan, I prefer to line my pan with tin foil, makes for easier removal and clean up. On top of your batter, sprinkle your chocolate and slightly push in.

brownie

Bake for 15-18 minutes. A toothpick wont come out clean because these are a fudgier brownie, but they will be somewhat firm to the touch.

cooked

While these are cooling, lets prepare the cookies.

Chickpea Chocolate Chip Cookies

1 1/4 cup rinsed chickpeas (15 oz can)

1/2 cup almond butter

1/4 cup coconut

1/4 cup pure maple syrup

dash of sea salt

1 tsp. of baking powder

1/2 cup chocolate chips

First off, shell your chickpeas. It isn’t a requirement but just like when you make hummus, shelled beans make the texture so much better. It’s somewhat time consuming but well worth it.

chickpeas

Just like with the brownies, blend all your ingredients except the chocolate chips. I scooped mine into a bowl to mix in the chocolate and for easier handling.

doigh

Your oven should still be set at 350 degrees. Spray a cookie sheet with non stick spray. Slightly wet your hands since the dough will be really sticky. Form into balls and flatten into a traditional cookie shape. These won’t rise so whatever shape you form them into, they will stay.

cookies

Bake for 15 minutes or slightly less if your oven runs hot like mine. Let cool along side your brownies.

Both recipes are refined sugar free, and gluten free, so they accommodate all sorts of people with food allergies or restrictions. And are super tasty at that!

plate

Now to see if they make it long enough to share.

diy: zucchini muffins

You know that phrase, Those that can’t do, teach…? There is a similar one. Those that can’t afford, make it themselves. I’ve been going through food “kicks” lately. I’d say it’s because of the pregnancy, but really I do the same thing when I’m not hormonal and with child. And then inevitably I get sick of that food and won’t eat it forever. Alright, where was I going with this?
Oh, yeah. My food kick. I started getting my iced white mocha at a different coffee stand lately, and to my delight, not only is their coffee fabulous, they have the BEST zucchini muffins. In fact, if Hayden is with me, we fight over the muffin. She yells from the back seat “Mama, share! Your supposa share wif me!” But at $5-$6 a pop, that craving gets expensive.

So my solution. I had a few of those delicious little green guys in my fridge, and I have an espresso machine too, turns out I’m just lazy sometimes. With the weather being warm and beautiful lately, and a book to finish for this months book club, I opted to whip up my favorite treat at home and have a laid back morning.

muffin

Zucchini Muffins

1 cup whole wheat flour

2/3 cup all purpose flour

1/2 cup sugar

1 tsp cinnamon

1 1/4 tsp baking powder

1/2 tsp baking soda

1/4 tsp salt

1 1/3 c shredded zucchini (I used one small zucchini, a handful of baby carrots and a few chunks of fresh pineapple)

1/2 cup milk

2 tbsp. oil

2 tbsp. honey

1 large egg

Preheat oven to 400 degrees. Combine dry ingredients. Mix zucchini with milk, oil, honey, and egg. Pour liquids into flour mixture and stir until moistened. I found the batter a bit drier than I like so I added just a little water. In a separate bowl, mix a tbsp. of brown sugar with cinnamon and sprinkle on top of muffins once in pan.

Bake anywhere from 10-14 minutes depending on oven. My oven cooks really hot so my time is always shorter than the recipe calls.

My white mocha is pretty self explanatory. Espresso, milk, white chocolate syrup. Stir, over ice.

I’m not going to blow this up and say it was above and beyond and I’ll never need to go back to get my fix, because I will. Probably soon. But I definitely won’t be complaining about this…

coffee